
Choosing the Best Bits to Make the Right Cuts
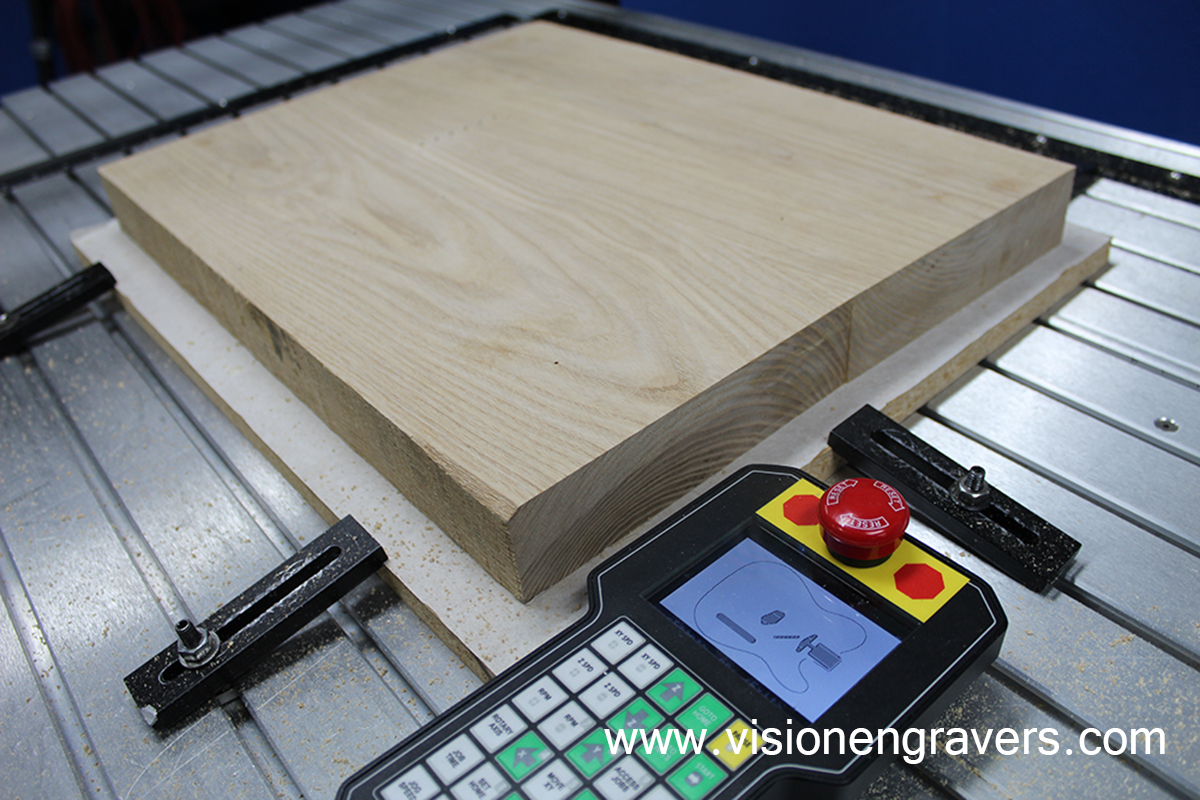
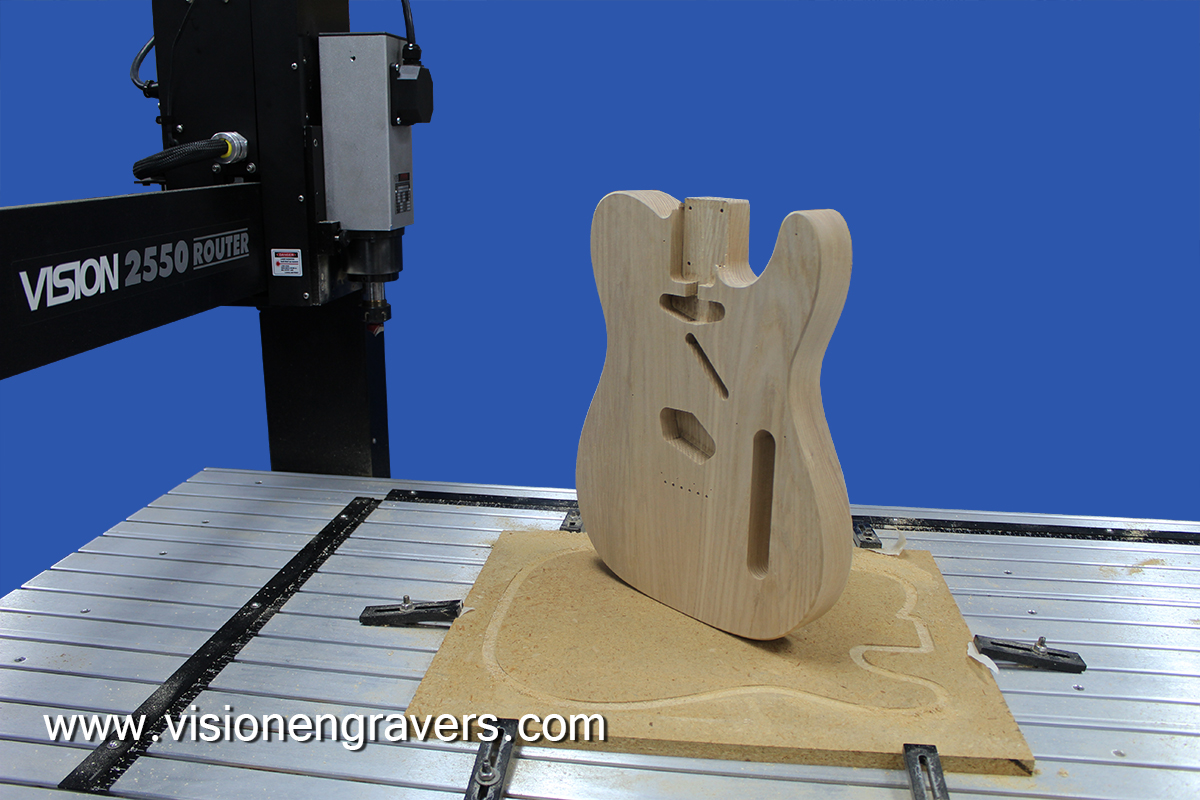
This is Part 3 in our making a Telecaster Style Guitar Body on the 2550 CNC Router Blog Post. In Part 1 we made the Guitar Blank, in Part 2 we attached the Blank to a sacrificial piece of MDF and we are just about ready to start machining our design. The Guitar Blank is firmly clamped on to the 2550 CNC Router’s Aluminum T-Slot Table, and the clamps are attached to the MDF so as not to damage the Blank. Before we can start machining, we must first choose which bits & sizes to use to cut out our design. Two things we took into consideration when choosing the size of our bits, what is the smallest size we would need for the intricate cuts and what is the largest size to decrease machining time? Below are the bits we choose and tool paths they were assigned to.
Bits & Assigned Tool Paths
- 1/16” 2 flute, upcut end mill (red)
- 1/8” 2 flute, upcut end mill (blue)
- 1/4” 2 flute, downcut end mill (green)
- 1/4” 2 flute, downcut end mill (purple)
- 1/2” flush trimming bit (purple)
- 1/2” round over bit (orange)
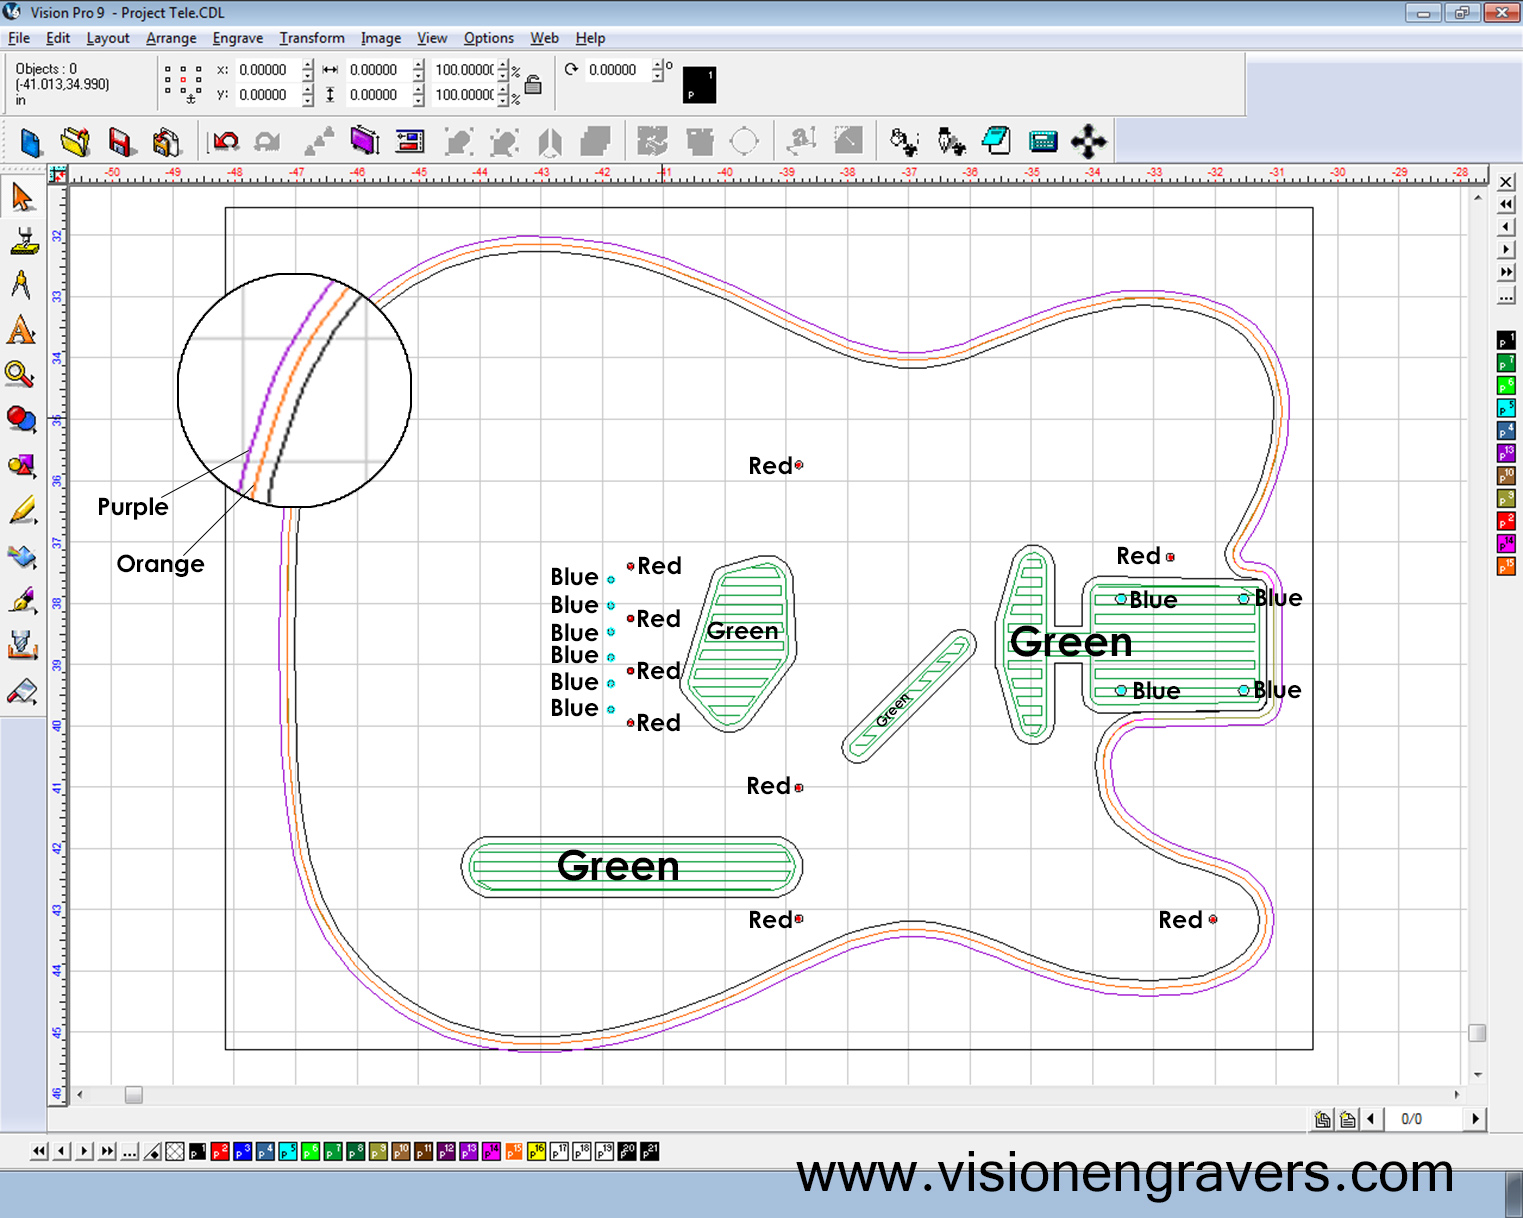
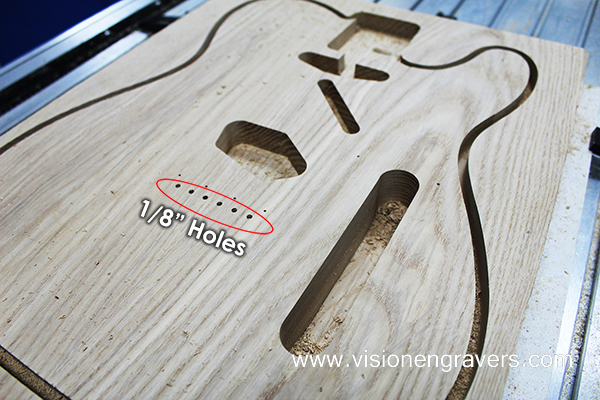
The 1/16” end mill (red tool path) was used to drill pilot holes to mount the bridge and pickguard, and the 1/8” end mill (blue tool path) was used to start the string and neck bolt holes. The 1/8” holes circled in the photo below does not go all the way through the Guitar Blank just yet, it will be completed from the backside of the guitar in another step. The control, pickup, wiring, and neck pocket cavities were created using the 1/4” downcut end mill (green tool path). The advantage of using downcut flutes is that they leave a very clean & smooth top edge, this will greatly reduce the amount of time spent sanding the machined areas.
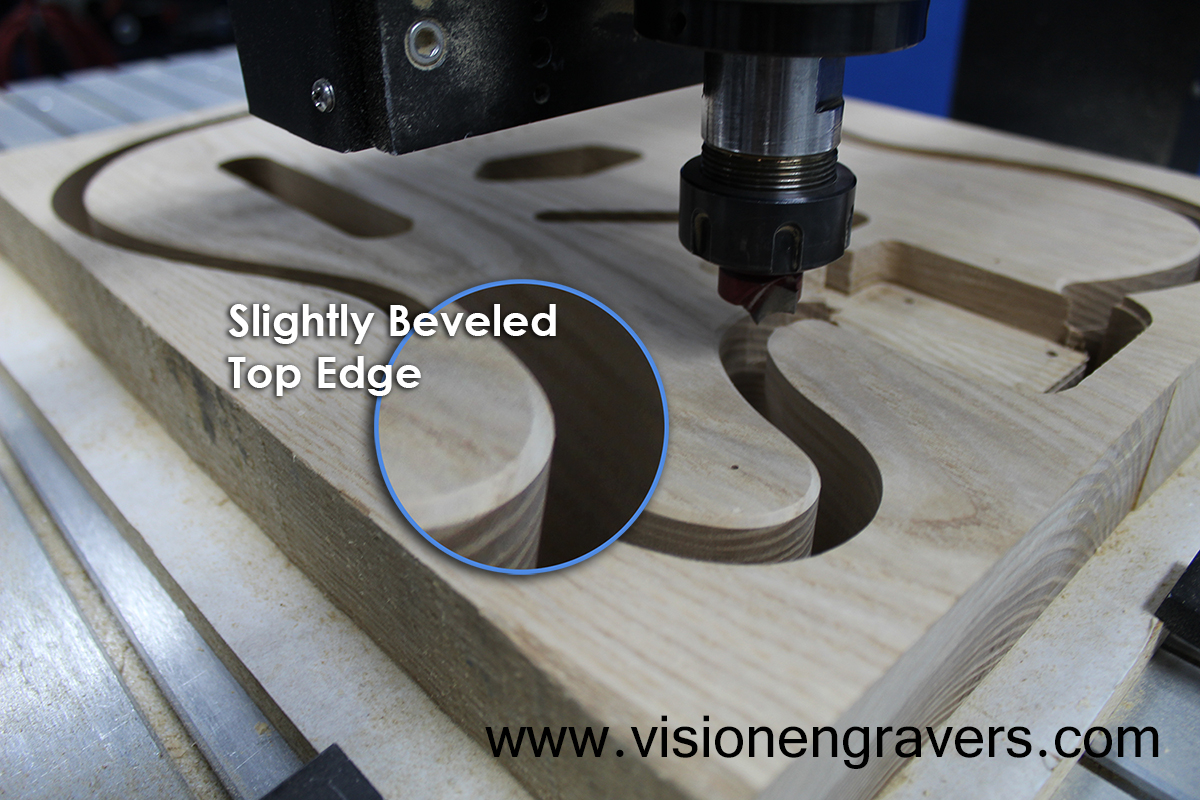
The outside contour was started with the 1/4” downcut end mill (purple tool path), then completed with the 1/2” flush trimming bit (purple tool path) and followed by the 1/2″ round over bit (orange tool path) to slightly bevel the top edge.
Machining the Back of the Guitar Blank
With machining on the front face of the guitar finished, we are now ready to do back of the guitar. Being that we are not a guitar manufacturer and this type of application is not something we do every day, we have developed our own method for flipping the guitar over while maintaining positioning on the 2550 CNC Router. So come back in a few weeks to read the next step in our Making a Telecaster Style Guitar Body Blog Post!
To read other post on making a Telecaster Style Guitar Body, click on the links below.
Part 1-Making the Guitar Blank
Part 2-Attaching Blank to a Sacrificial MDF
Part 3-Bits & Cuts
Part 4-Machining the Back
Part 5-Making a Custom Pick-Guard
Videos
Click the link to watch a short video of the
2550 CNC Router machining the front face of the Telecaster Guitar.
Click the link to watch a short video of the
1612 Pro engraving a Pick Guard for the Telecaster Guitar.
Author: Luke Davis