
Doing a crosshatch fill will give a diamond grid look to the object you are doing the diamond drag on.
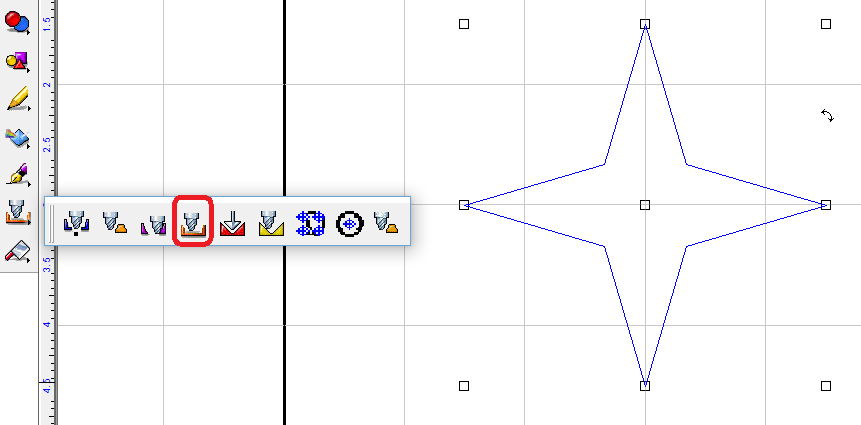
For this example we have a 4 point star. Select the star, go to tool paths, and click on Fill.
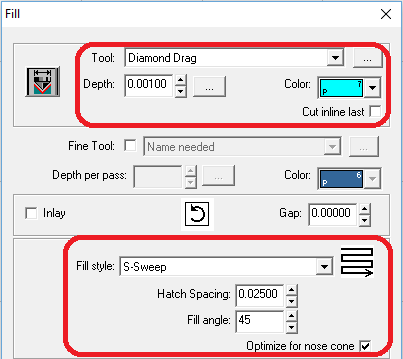
Select the diamond drag tool, pick a color for the tool path, use S-sweep as the fill style, change the hatch spacing to.025 (this will widen out the space between the tool lines, change the angle to 45 and run it.
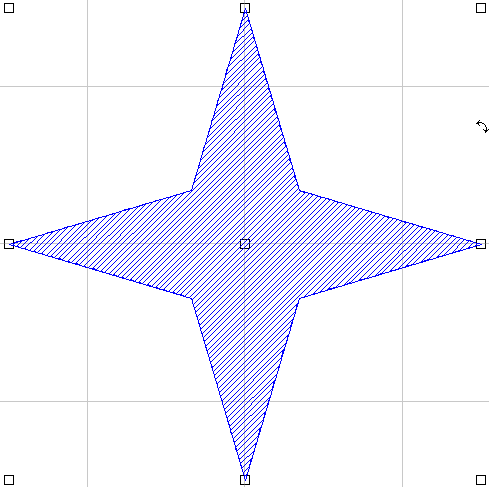
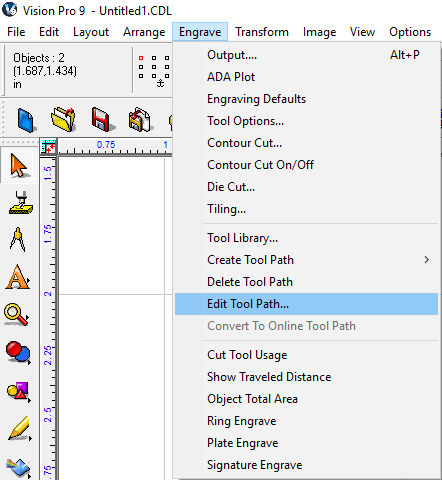
While that is running, click on Engrave (at the top), click on Edit tool path, put a minus symbol in front of the 45 for the fill angle, and then run it.
If you find that the diamond pattern is not big enough, try making the hatch spacing bigger, so instead of .025 go with .035 or something to that effect, until you get the desired effect.