
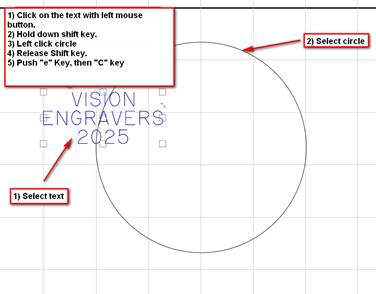
- Click on the text with your left mouse button.
- Hold down shift key.
- Left click circle with mouse.
- Release Shift Key.
- Push “e” Key, then “c” Key to center an object into another other object.
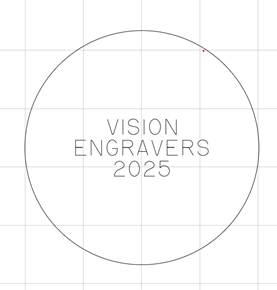
Text is now centered inside the circle.
Check back next month for our next Engraving or CNC Routing Quick Tip. Contact Vision Engraving & Routing Systems to learn more about Centering an Object inside another object in Vision Engraving Software. To learn more about our machines, visit us at www.visionengravers.com or call 1-888-637-1737. Be sure to check out our All Post List, lots of helpful Engraving Machines and CNC Routing tips there.