
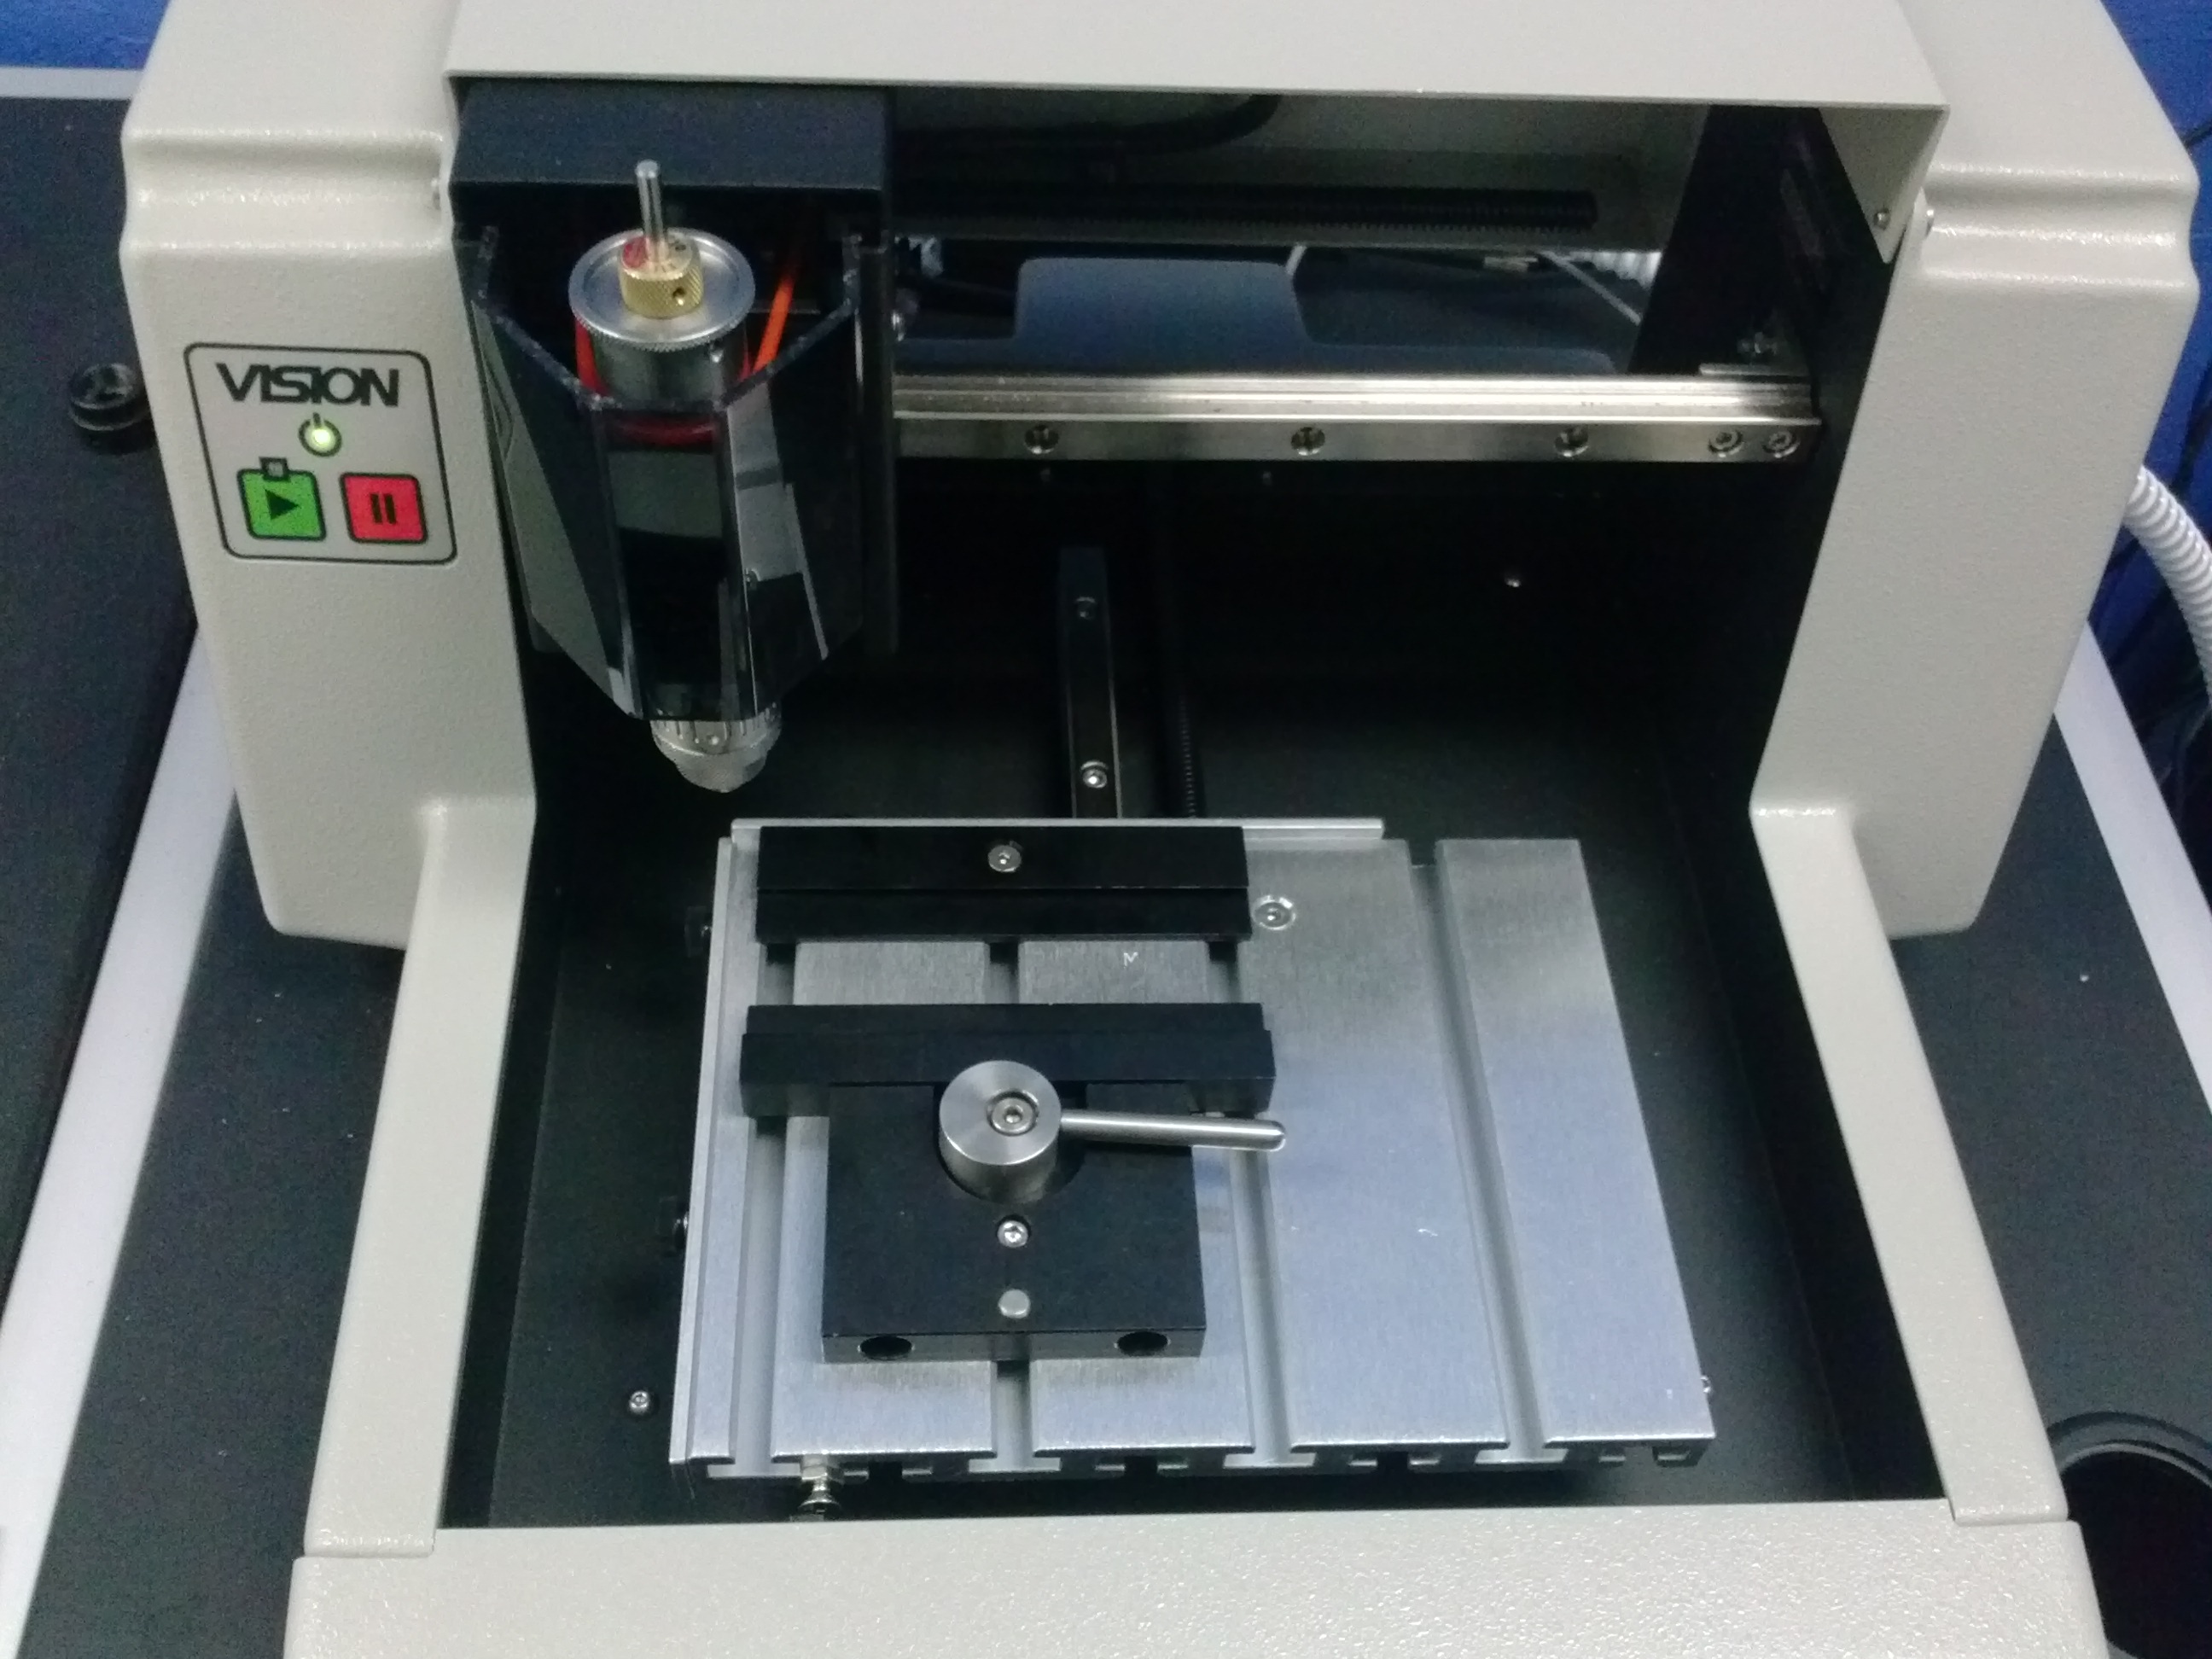
For this tutorial, a Vision Express engraver was used with the Quick Lock Leather Bracelet Vise, a .015 FLX cutter and Vision Expert software.
Physical setup:
Start by measuring the height and width of the bracelet in the area to be engraved. These measurements will be used later to set the plate size in the Vision Expert software
*Note*– Be aware that the vise sticks up above the surface of the bracelet. If the cutter comes in contact with the vise, damage to the vise and/or cutter may occur.
Measure the distance the vise overlaps the bottom edge of the bracelet, the measurement will be used in the software setup.
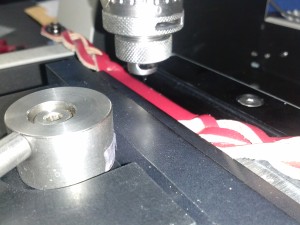
Install the vise on the table. When inserting the leather bracelet, do not clamp the bracelet too tightly, as this may cause the bracelet to bow up in the center and affect engraving quality. Simply hold the bracelet firmly. The easiest way to consistently engrave several bracelets of the same size is to use the left side edge guide as a reference for where to locate the bracelet’s left edge of the area to be engraved. Lower the edge guide before placing the bracelet in the vise. In the picture below, the left edge of the bracelet’s engraving area is positioned on the inside edge of the edge guide.

Place the FLX cutter in the spindle, lower the cutter tip below the bottom of the nose cone enough that the nose cone doesn’t hit the vise while engraving. The cutter should stick out about 3/8 inch below the bottom of the nose cone.

In the Vision Expert software, Create a custom home at the upper left corner of the area to be engraved by clicking on the Jogger function on the top toolba. Click on Connect, then jog the spindle over the upper left corner of the engraving area. Use the cutter tip as the “pointer”. To assist in positioning, the jog speed can be changed to either fast or slow in this window.
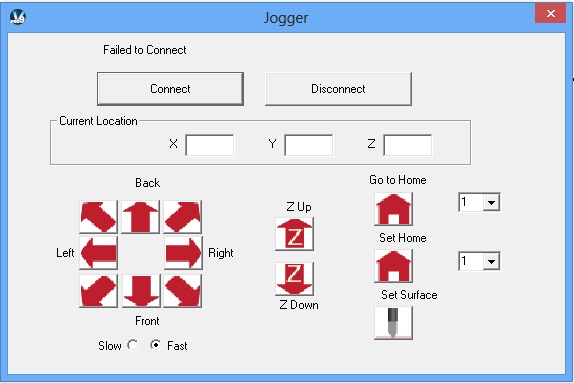
Select a home number from 1-7 in the drop down to the right of the Set Home icon, then click on Set Home. Home position #0 should NOT be used as this is the machine’s default home position. The home position you have now set is stored in the machine and can be used anytime in the future. To verify this new home position was set properly and saved, use the drop down numbers next to the Go to Home icon and change the number to 0 , then click Go To Home. The spindle would go to the machine’s default home in the upper left coren of the table. Change the Go to Home number back to the number you’ve chosen as the upper left corner of the bracelet’s engraving area and click Go To Home again. The spindle should move to the upper left corner of the engraving area on the bracelet.
The proximity sensor is not used in this application. Instead, the set surface function must be used.
Using the Jogger arrow icons, jog the spindle over to the middle of the leather bracelet.
Use a piece of paper to lay on top of the leather under the cutter tip, then lower the spindle by clicking on the Jogger Z Down icon. Move the paper back and forth while lowering the spindle until the tool barely touches the paper. When it does, you will feel resistance when moving the paper.
In the Jogger window, click on Set Surface. The spindle will then rise, indicating the surface has been set and saved in the machine’s memory. Click on Disconnect and close the Jogger window.

Software setup:
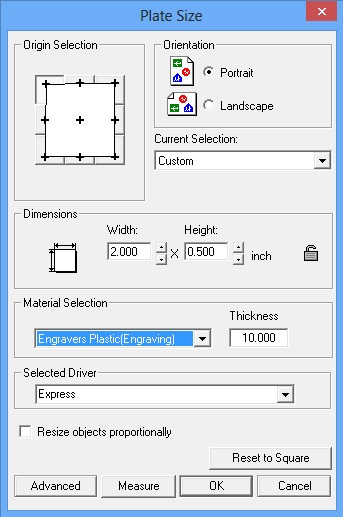
Start with the Plate Size, then using the drop down menu, choose Custom (under the Current Selection). Use the measurement of the area to be engraved on the bracelet you measured earlier and use that as the plate size. For this example, the Width was set to 2 inches and the Height to 0.5 inches. For Material Selection, choose Engravers Plastic (Engraving). Make sure the Selected Driver for the express, then click OK.
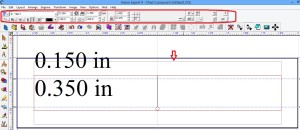
The measurement of the vise overlapping the bottom of the bracelet can now be used to set up guide lines in the software that will indicate the upper and lower limits of where the graphic or text can be located. Right click on the screen. The Edit Guides window will appear. Click on the horizontal line icon. Since the vise overlaps the bracelet 0.15 inches, enter 0.15 in the Y text field, then click Add. To determine the bottom guide line location, subtract the overlap (0.15 inch) dimension from the bracelet height (0.5 inch) dimension. This should be 0,35 inches. Enter 0.35 in the Y text field, then click Add. Click on OK to close this window. The guidelines can now be used as the upper and lower limits for the graphics or text to be engraved.

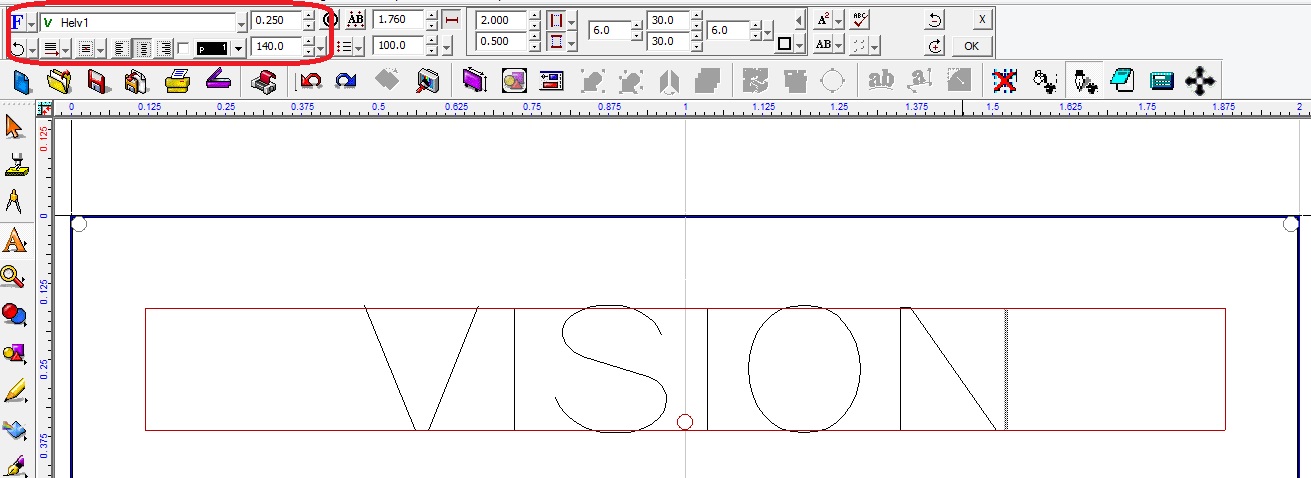
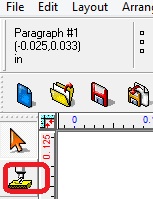
In this example, text was added by clicking on Frame Text Compose icon, within the Text Tool menu located on the left toolbar.
![]()
This tool centers text within the plate. Adjustments to font, font size and various other font settings can be performed using the fields on the top toolbar. Note that the location of the guide lines set in the previous step are displayed on the screen.
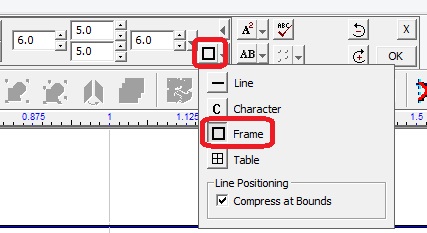
In order to change the limits of the text height, click on the Toolbar Mode icon and then on the Frame icon as shown.
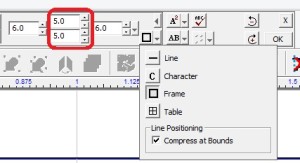
Go to the margins entry fields and adjust the top and bottom margins until the frame is slightly inside both the top and bottom guide lines. You do not want the frame to overlap the guide lines. If the text is allowed to do so, the cutter will likely contact the vise, causing damage to the vise and/or cutting tool
Enter the text as shown and when finished, click outside the plate area to exit text mode. The file can now be saved as a template for the style of bracelet being used here.
A Tool Path is needed to control the depth of the engraving. Select the text by single clicking on the text, then click on the Tool Path Tools icon on the left toolbar and then on the Online Path icon.

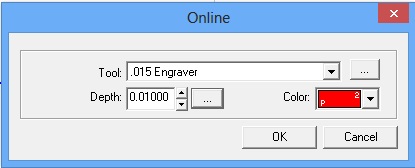
Pick the appropriate tool from the drop down menu. In this example, the 0.015 Engraver was chosen. Enter the engraving depth in the Depth field. For leather bracelets, 0.010 inches is suggested, although more or less depth may be necessary depending on the thickness of the colored layer on top of the bracelet. Select the color for the tool path, such as red, then click on the “…” icon to the right of the Depth field.
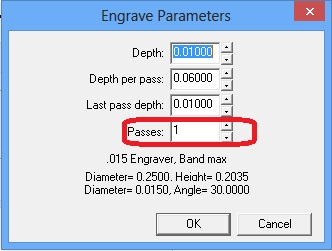
The Engrave Parameters window will appear. Likely, the number of passes and depth per pass will be odd numbers. We will only need one pass for this application, so click on the down arrow to the right of the Passes field until 1 appears. The other parameters will automatically adjust. Then click on OK to close the Engrave Parameters window, the click on OK to close the Online tool path window.
In order to see a visualization of the path the tool will cut into the material, select View from the top menu bar, then select Show Line Style. A representation of the cut path will be shown (below). Note – If the path overlaps the guide lines drawn previously, the cutter may contact the vise. If this is the case, press CTRL + Z to undo the tool path, double click on the text to enter text mode, revise the top and bottom text margins to make the text height smaller, the create another online tool path.

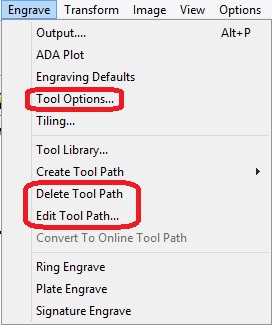
There is no preset material setting for leather, so a new material setting will need to be added. Select Engrave on the top toolbar menu, then select Tool Options. Note that the tool path can be deleted or edited from this menu as well.
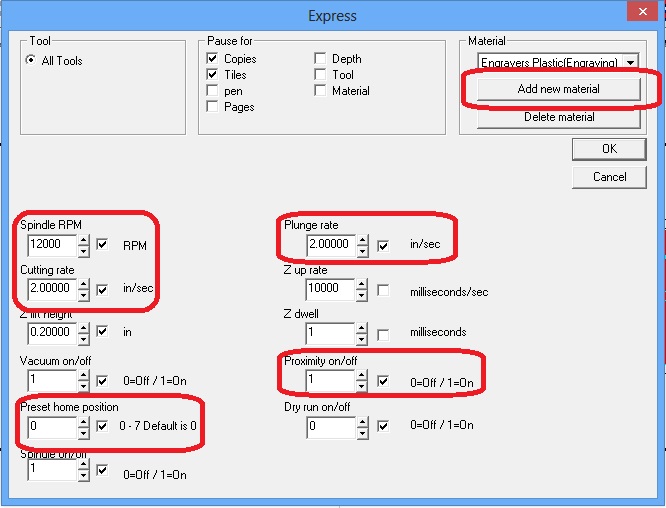
A window with the list of materials will appear. Click on Add New Material, type in a name for the material, such as Leather. Change the Spindle RPM to 12000, Cutting Rate to .3, the Plunge Rate to 1, choose the Preset Home number (1 in this example), set the Proximity to 0, then click OK. To close this window and save the new material settings.
To send the job to the engraver, click on the Engrave icon.
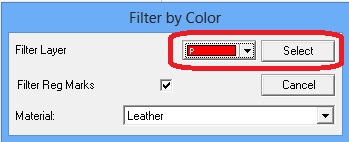
Make sure the new Leather material setting is chosen, then click on Filter By Color.
Choose red from the drop down menu, then click on Select.
The screen will show a preview of what will be sent to the machine.
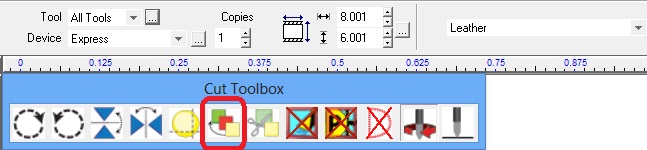
Click on the Engrave icon in the Cut Tollbox to send the job to the machine.
![]()
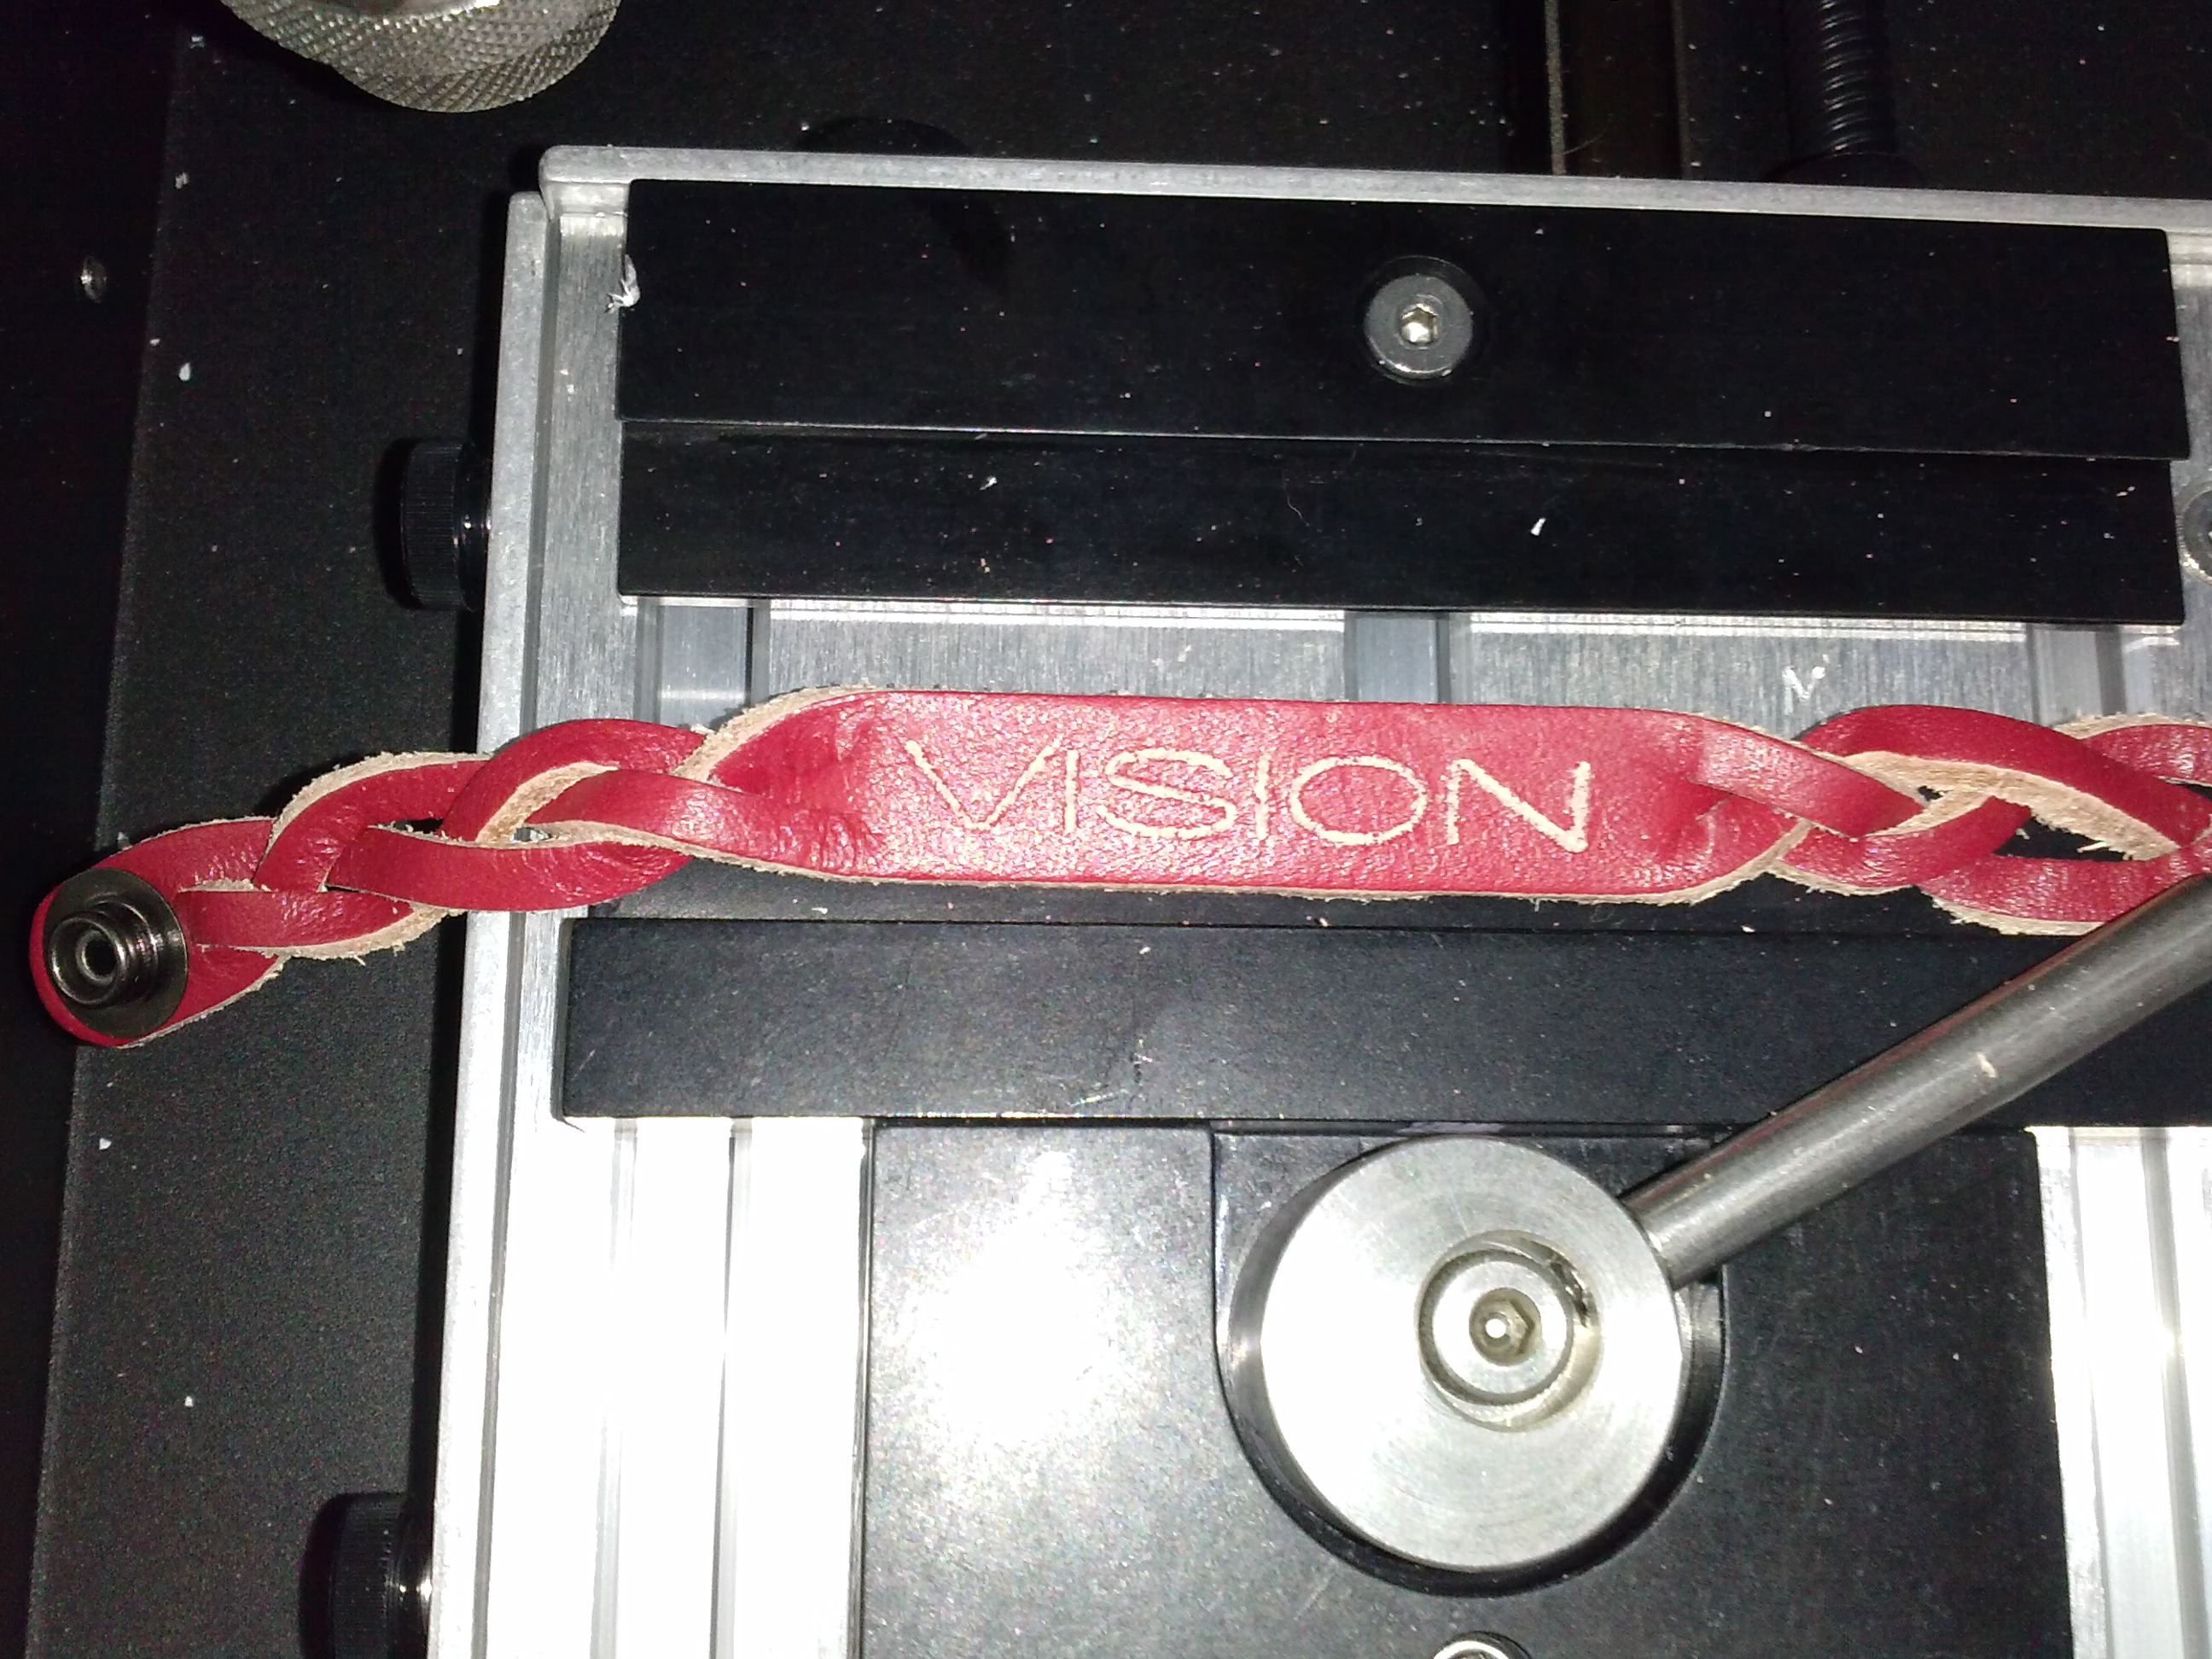
After a few seconds, the green light above the start button on the machine will be flashing, which indicates that the job has been sent over. Press the start button on the machine to start the job. *Note* It is highly recommended to be ready to press the pause button, just to be safe.
If the engraving is not deep enough on the bracelet, edit the tool path depth setting by clicking on Engrave on the top toolbar menu, then click on Edit Toolpath, adjust the depth, and rerun the job.