
This blog post refers to engraving INTO metals (more than a few thousandths deep) as opposed to engraving on metals (burnishing or dragging). Engraving into metal has its own unique challenges, with many variables and options.
There are a few basic concepts to be considered when engraving into metals; such as stainless steel, brass and aluminum.
- Holding the Engraving Material
- Custom Jigs
- Cutters, Cutting Fluid, and Spindles
- Z-Axis Spring Tension
- Z Dwell Time
- XY Speed
- Multiple Pass Setup
- Spindle Motor Speed
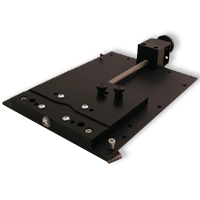
Vera Vise
Holding the Engraving Material
The biggest challenge in engraving is being able to hold the material. Engraving into metal typically will exceed the holding ability of tape or multi mat. The holding device should keep the item from moving and, if possible, be easy to use. You want to be able to set and remove material as efficiently as possible with our sacrificing your holding integrity or damaging the material.
Custom Jigs
For highly repetitive work, you may want to consider a custom jig designed specifically for a specific job. A good, efficient jig should allow for quick, easy, and accurate placement of material with minimal effort. You may find that a custom jig is well worth the investment.
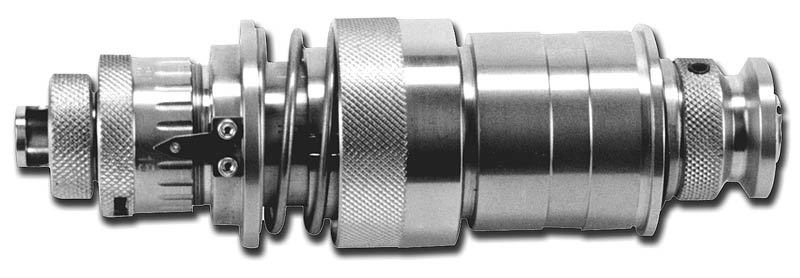
Series 3 Vision Spindle
Cutters, Cutting Fluid, and Spindles
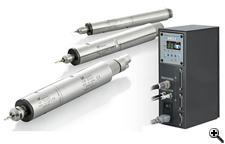
50,000 RPM Spindle

Misting System on 2550 Router
Engraving into metal is very tough on cutters. It is recommended that standard engraving cutters designed specifically for cutting metals and end mills be used. For best results, try double ended, double-fluted end mills. End mills will provide you with far superior quality, plus, they are easier to use. Whatever style cutter you end up using, you should plan on having many duplicates to allow for replacement of broken cutters and for cutter sharpening.
It is also recommended that you use cutting fluid. This will extend the life of your cutters by lubricating the cutting surface and helping to cool them. You will also find that this will help produce a smoother finish on the cut. An automatic misting system is available on many Vision Engravers & Routers, which distributed lubricating fluid onto the engraving material as it cuts.
A collet spindle is also a must for this type of engraving. Standard top load spindles do not offer enough support of the cutter towards the bottom of the spindle. This will allow the cutter to “chatter” under heavy engraving loads, which will produce poor engraving quality and reduce the life of your cutters. Vision offers a High-Frequency 50,000 RPM Spindle, which allows for faster engraving into stainless steel.
Z-Axis Spring Tension
Since stainless steel is obviously harder than plastic, it will require more pressure to penetrate the surface. For maximum pressure, you will need to tighten the Z-axis spring pressure so that the threads of the spring are completely compressed.
Z Dwell Time
A slower Z-Dwell time is important when engraving stainless. By slowing the Z Dwell time, you allow the cutter to fully penetrate the material before moving. A one second dwell is a good starting point.
XY Speed
XY Speed describes the actual engraving or cutting speed. To maintain higher quality engraving on stainless as well as add longevity to your cutters, you should use a slow XY speed. The speeds will vary dependent upon the material, depth of cut, and the sharpness/condition of your cutter. Practice engraving on a scrap piece of material before engraving onto a valuable item.
Multiple Pass Setup
For a cleaner cut and for less abuse both to your cutters and engraver, it is recommended that you use multiple passes to acquire your final depth. On stainless, you can safely engrave and acquire a clean cut by using a depth of .004-.005” per pass.
A final clean-up pass also helps clean up burrs generated by cutting deeper on the initial cuts. Clean-up passes are typically no more than .001-.002” deeper than the final pass. So, for a desired depth of .012”, set pass numbers one and two to .005” and pass number three to .002”.
Spindle Motor Speed
The Spindle Motor Speed refers to the rotational speed of the cutter. This varies depending of cutter size, engraving depth, and XY Speed. Too slow of a speed can increase your chances of breaking the tip off your cutter. Too fast of a speed can actually cause the engraving material to fuse onto the tip of the cutter. This creates a very dull cutter and produced a rough or gummy looking cut in the material.
Start Your Motor Speed at a medium to slow speed and listen to the engraver as it cuts the material.
Adjust the speed up and down in small increments to find a setting that sounds as if the engraver is not having to struggle or labor through the cut. This takes a little practice through trial and error, so don’t get discouraged if it doesn’t seem obvious at first.
Click Here For More Stainless Steel Engraving Tips!
Have another question about engraving into metal? Please post it in the comments.