Vision Expert and Vision Pro Software have over seventy Import Filters including PDF, AI, EPS, PLT and DXF, allowing you to import files from most types of Graphic Design and CAD programs.
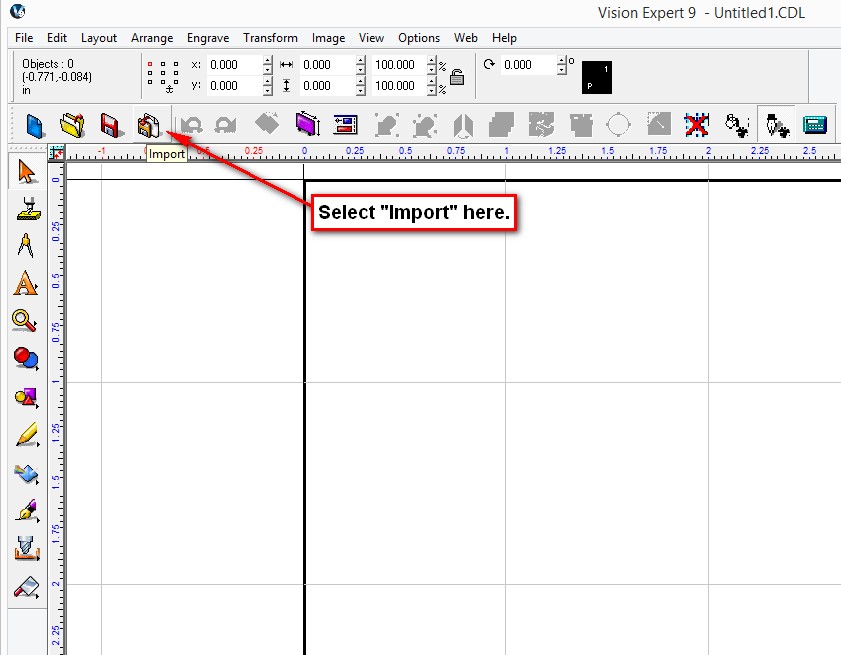
To import a file, select the “Import” Icon within the Vision Software. For this example, we are using Vision Expert.
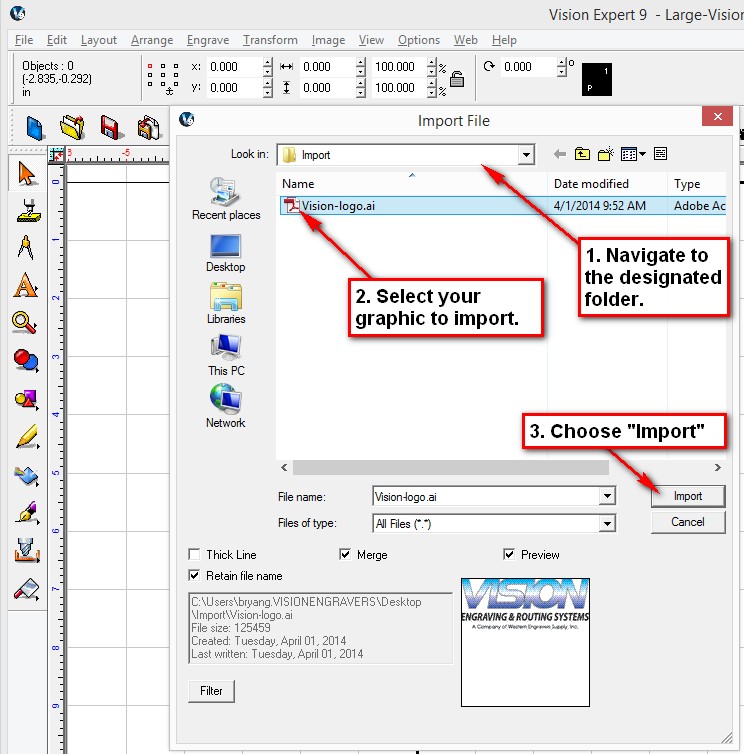
This dialog box will appear. Navigate to the appropriate folder where the graphic file is located, and choose “Import”. You can also drag and drop the file into the Vision Software.
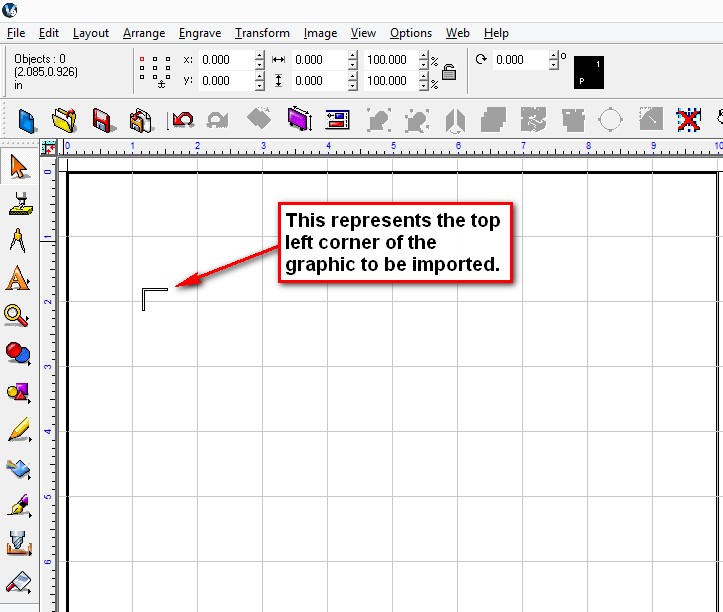
Next, you will notice your mouse cursor is replaced by the object below, which represents the top left corner of the graphic to be imported. For this example, we will place it in the top left corner area of the plate.
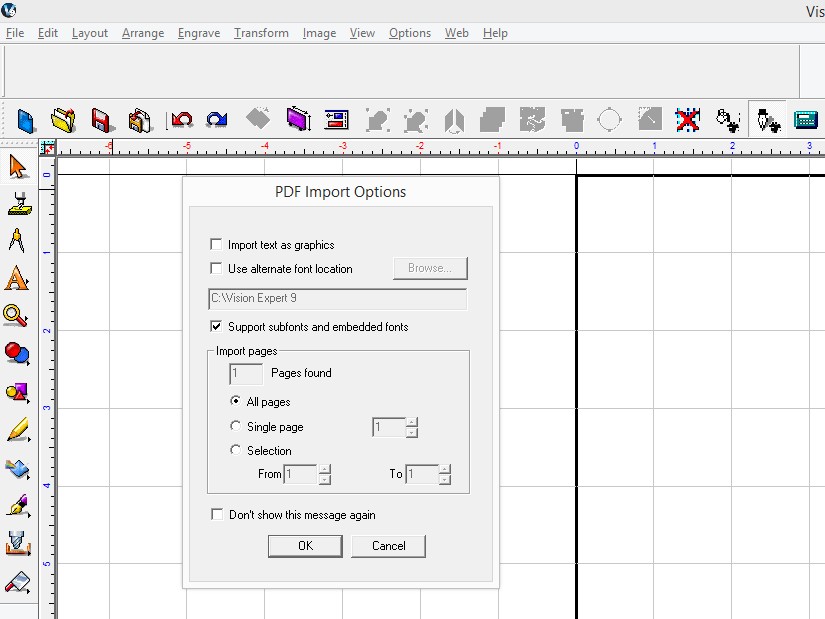
Depending on the graphic you are importing, you may see a DXF, EPS, or PDF Filter prompting you to select your Import Options. The general rule of thumb is to use the default settings, and adjust the settings as needed if you are not getting the desired results.
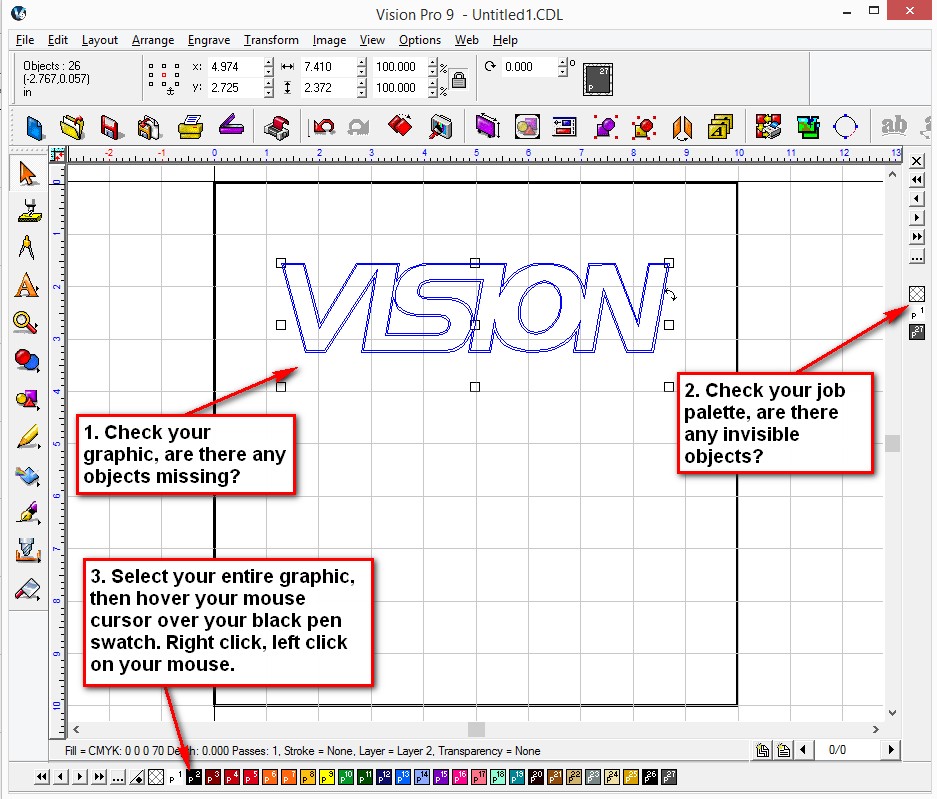
Once your graphic is imported, be sure to check your Job Palette as there may be “invisible” layers. If any invisible or white layers are present, change the colors to black.
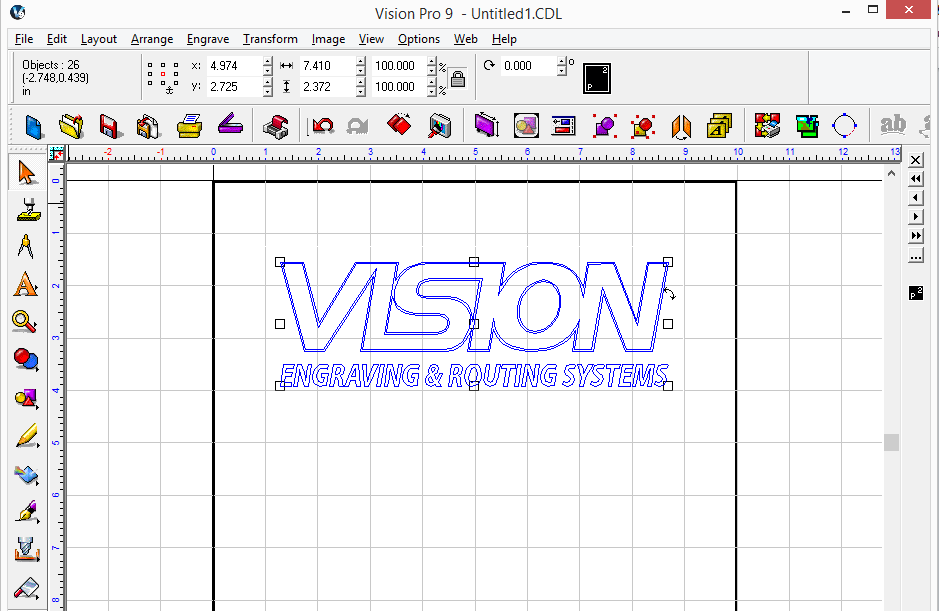
Now that all objects have been changed to black, you can see all of the layers.
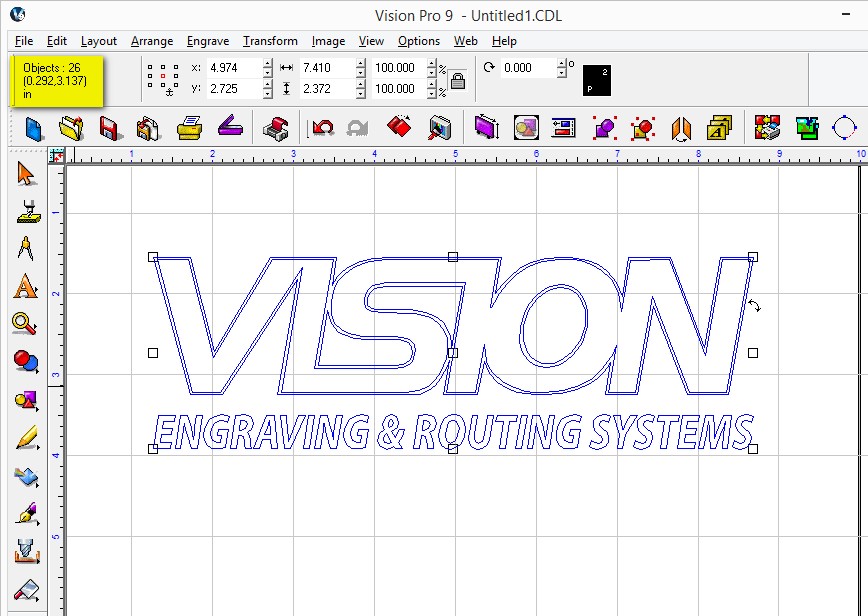
Also, be cautious of multiple layers being imported. This can be determined by making note of how many “Objects” you have selected, shown highlighted below: