
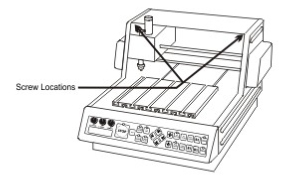
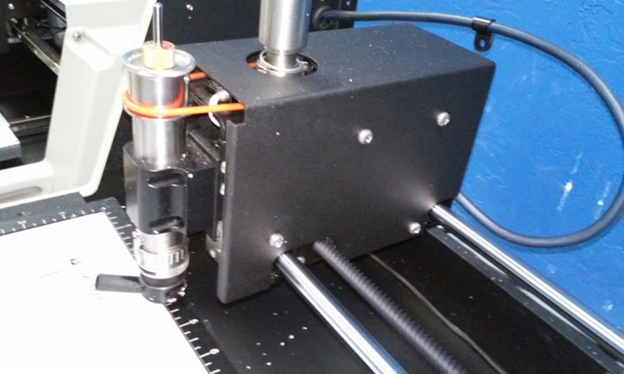
CHANGING THE MOTOR BELT ON THE 1612, 1624, 2424, & 2448 ENGRAVING MACHINES
Engraving Motor Belt Replacement
If the belt appears to flare out when the spindle is operating then it should be replaced. A belt is used to drive the engraver’s spindle. It runs between the motor drive pulley and the spindle pulley. If it needs replacement, first remove the cover. Next, remove the old belt by rolling it to the top of the spindle pulley, then slightly stretching the belt to snap it over the top of the spindle pulley. Once loose, it can easily be removed from the machine. To install the new belt, position the new belt around the drive pulley, then lightly stretch it to snap over the top of the spindle pulley. NOTE: Be sure to purchase the specified replacement belt from Vision Engraving Systems. Having the correct belt size is extremely important to the functionality of the motor. NEVER EXCESSIVELY STRETCH THE BELT!
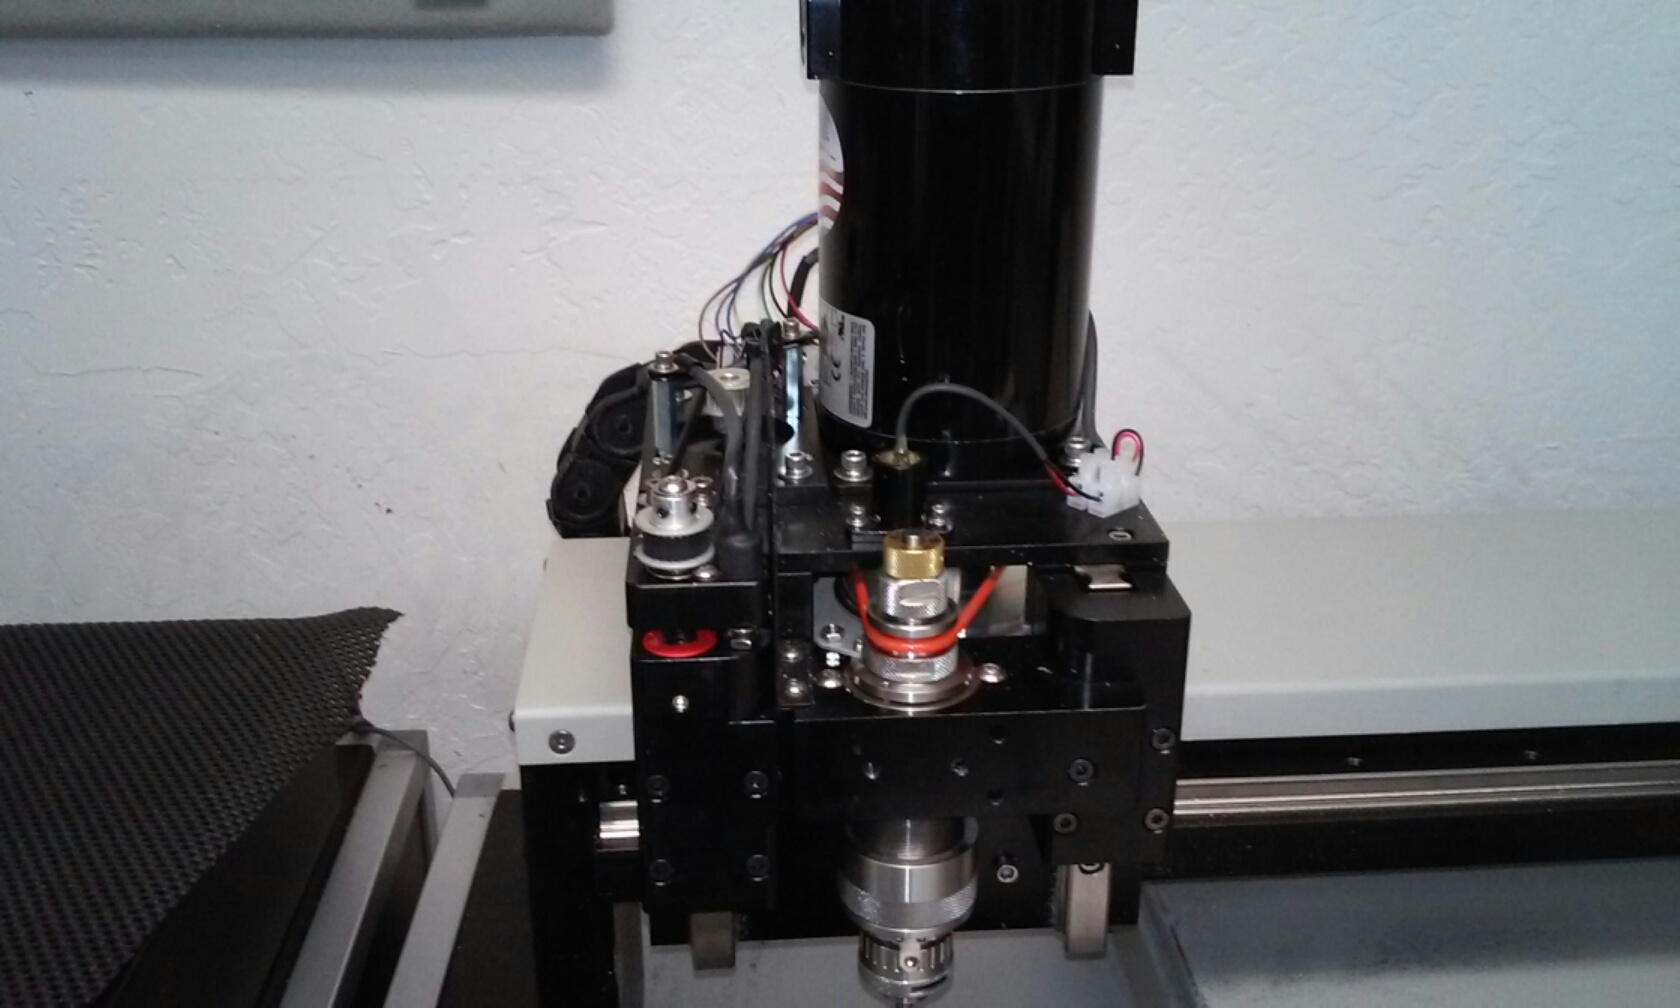
Helpful Tip: Remove any cutter or drawbar from the spindle, this will make it easier to remove the belt.
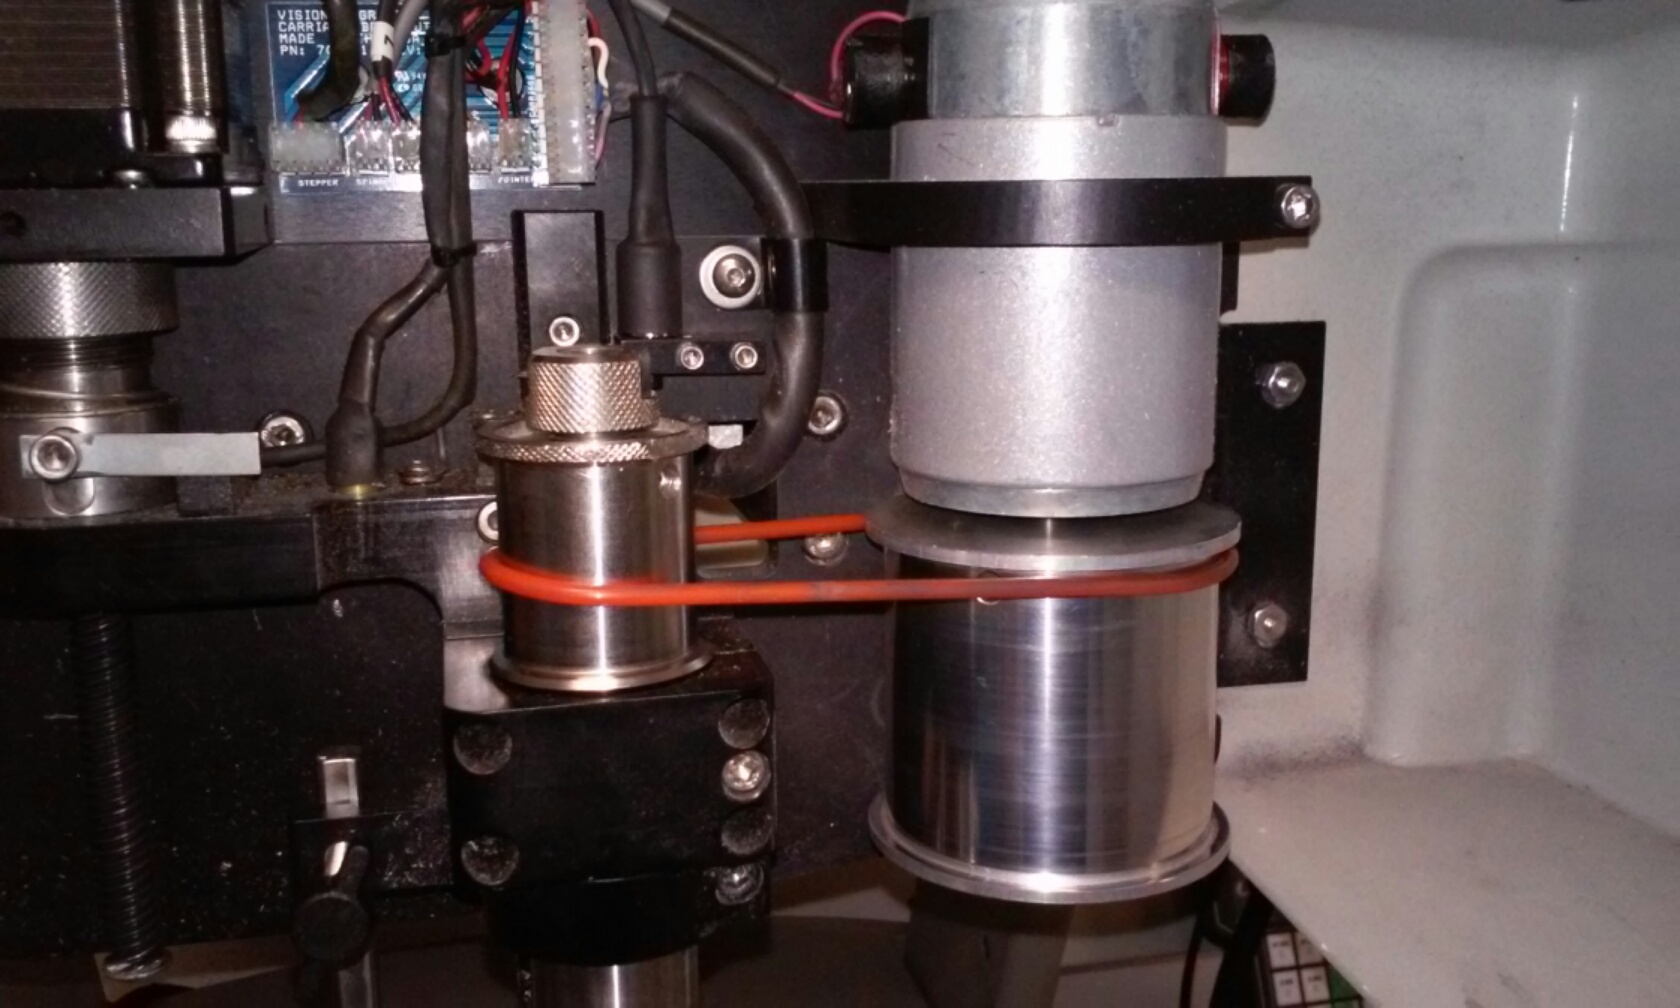
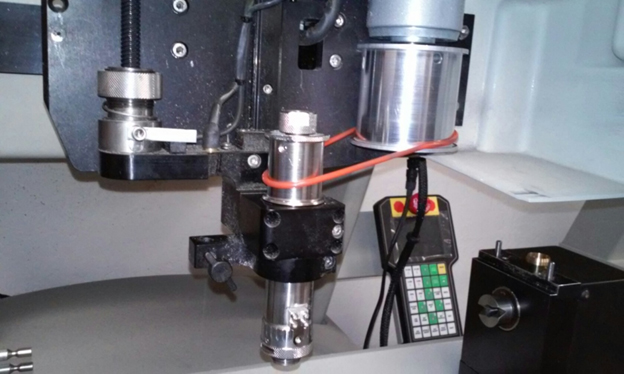
CHANGING THE MOTOR BELT ON THE 1624R, 2525, & 2550 CNC ROUTERS
Engraving Head and High Speed Spindle Drive Belt Replacement
A belt is used to drive the engraver’s spindle. It runs between the motor pulley and the spindle pulley. If the belt appears to flare out when the spindle is operating then it should be replaced. If it needs replacement, remove the old belt by rolling it to the top of the spindle pulley, then slightly stretching the belt to snap it over the top of the spindle pulley. Once loose, it can easily be removed. To install the new belt, position the new belt around the drive pulley, then lightly stretch it to snap over the top of the spindle pulley. NOTE: Be sure to purchase the specified replacement belt from Vision Engraving Systems. Havingthe correct belt size is extremely important to the functionality of the motor. NEVER EXCESSIVELY STRETCH THE BELT!
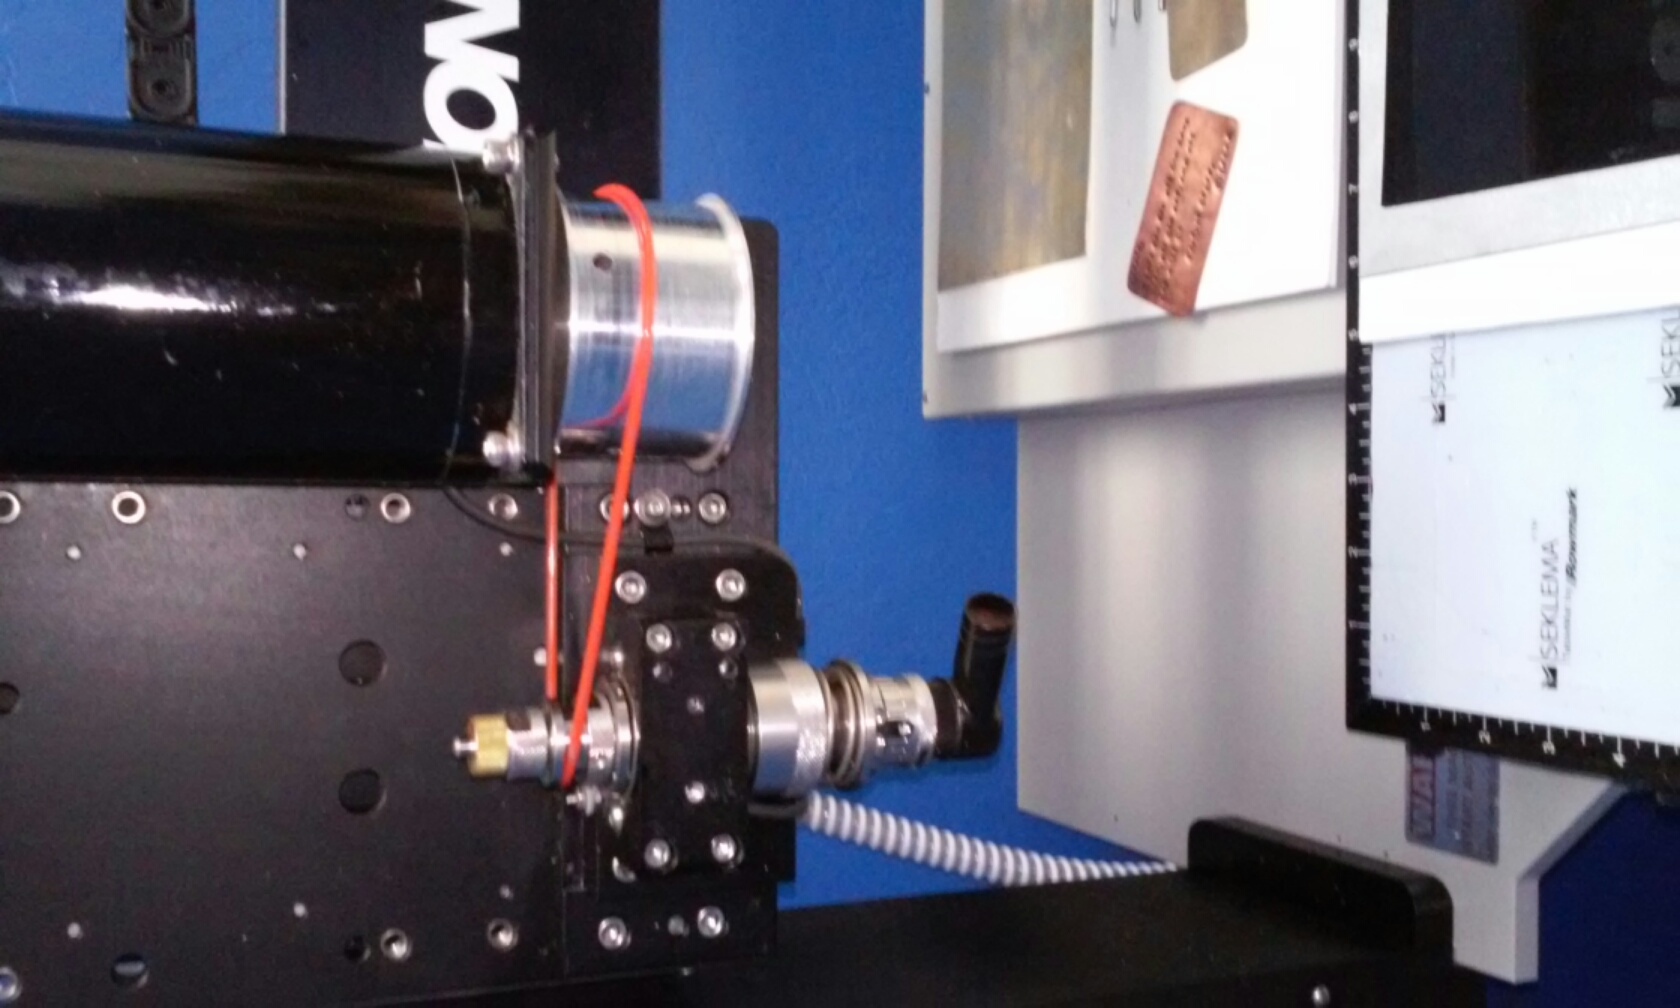
Helpful Tip: Remove any cutter or drawbar from the spindle, this will make it easier to remove the belt.
CHANGING THE MOTOR BELT ON THE MAX & MAX PRO ENGRAVING MACHINES
Changing the Motor Belt
If the belt appears to flare out when the spindle is operating then it should be replaced. Turn off power to the Controller. Open the spindle housing cover to access the belt.
Helpful Tip: Remove any cutter or drawbar from the spindle, this will make it easier to remove the belt.
Move the spindle down so the top of the spindle pulley is toward the bottom of the spindle motor pulley. This will make it easier to remove the belt. Pull the belt off from both pulleys.
Inspect the pulleys for any physical damage like burrs or nicks that could damage the belt. Replace the belt by stretching it over the spindle and motor pulley. Check the belt once a month.
CHANGING THE MOTOR BELT ON THE PHOENIX 1212 ENGRAVING MACHINES
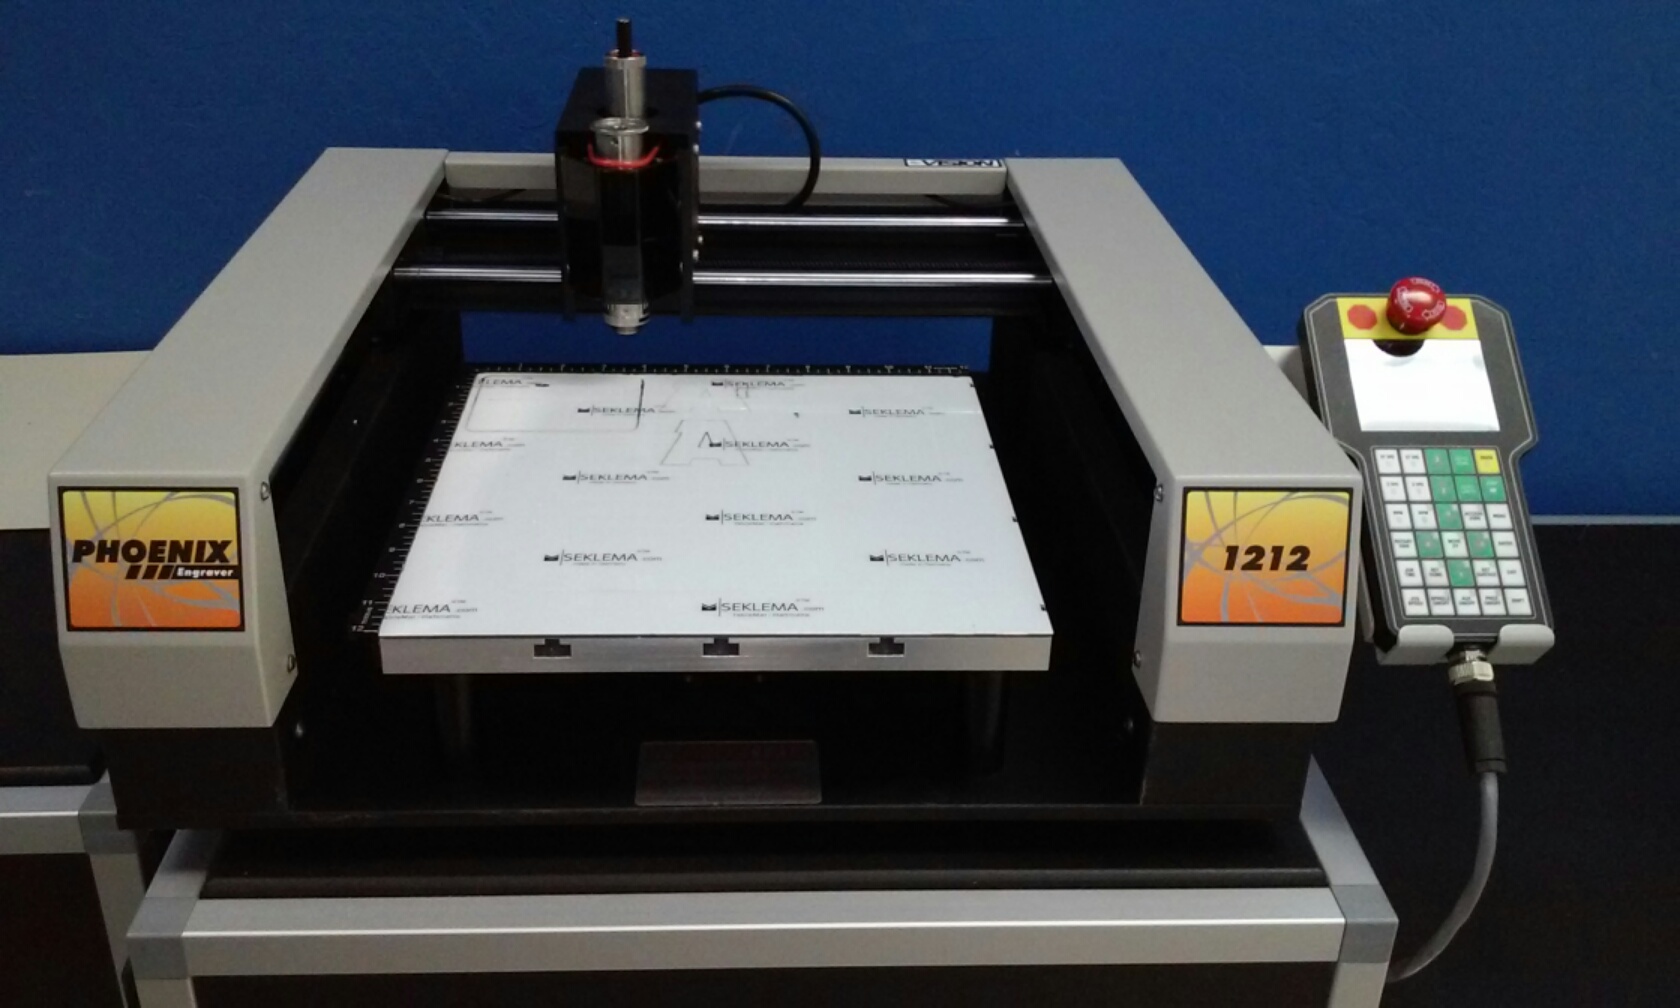
Over a period of time, the Phoenix 1212 motor belt will wear. When the motor belt wears, it will stretch and cause the spindle to slip or stall. When this happens, the motor belt generally needs to be changed. The following explains the procedure for changing the motor belt.
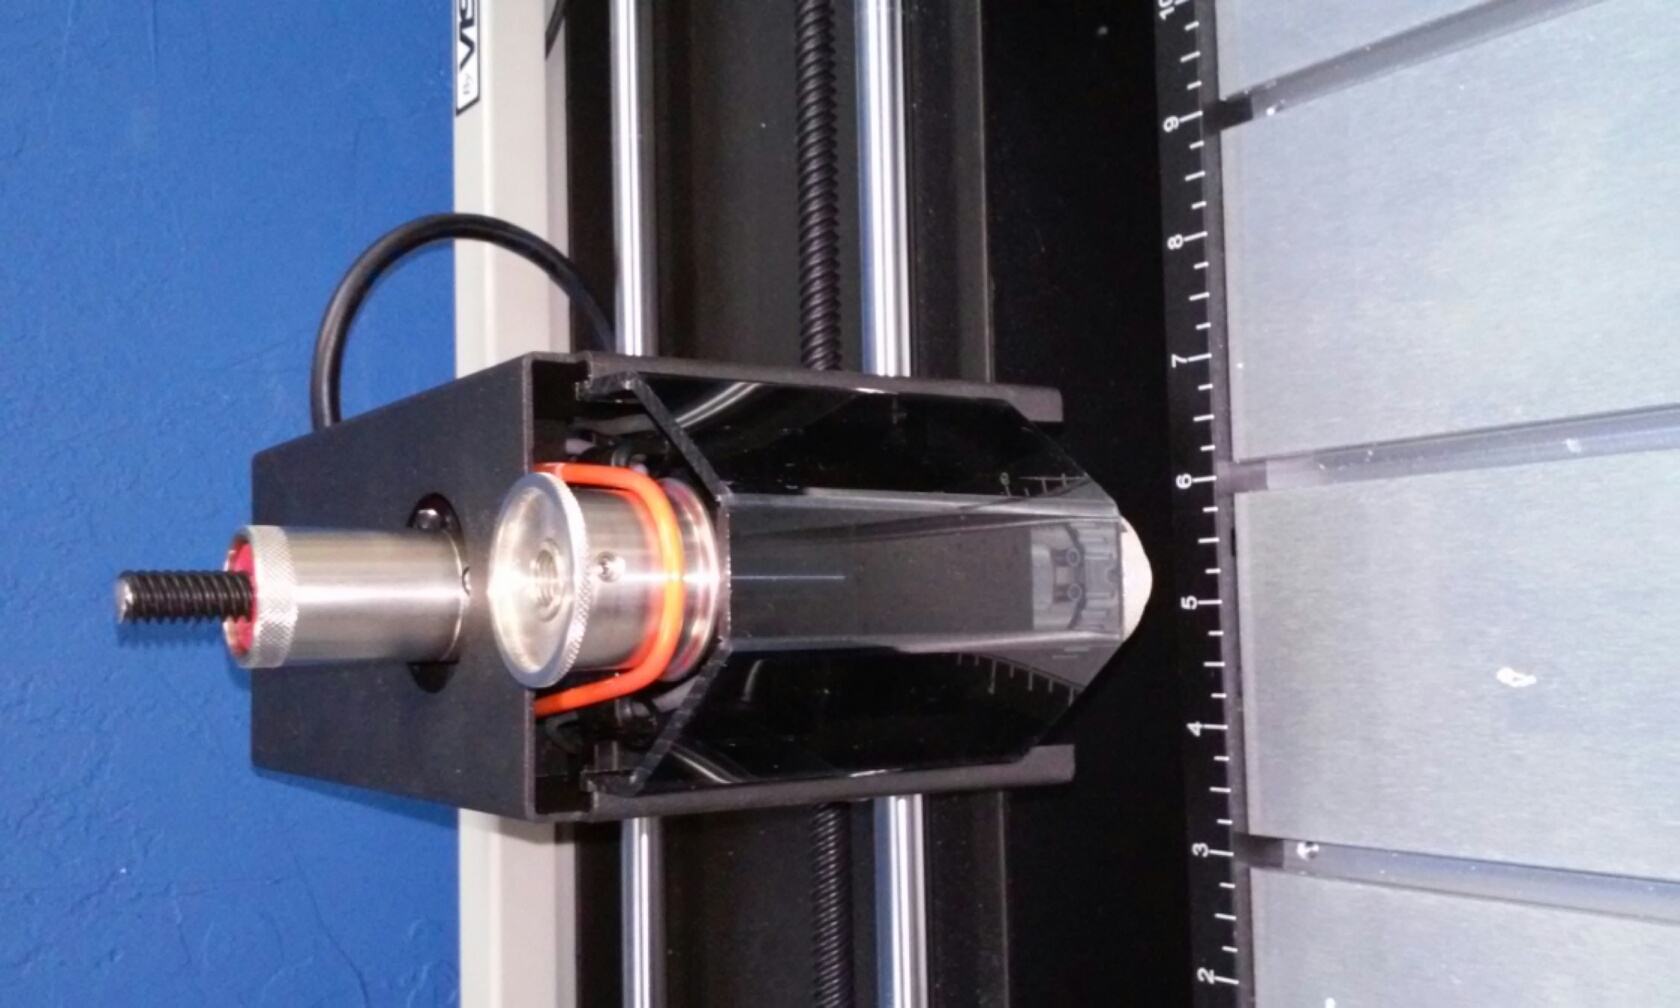
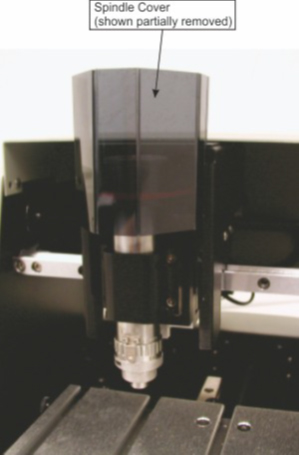
COVER REMOVAL
Spindle Cover
To remove the spindle cover, slide the cover up. Squeezing the sides of the cover will facilitate removal.
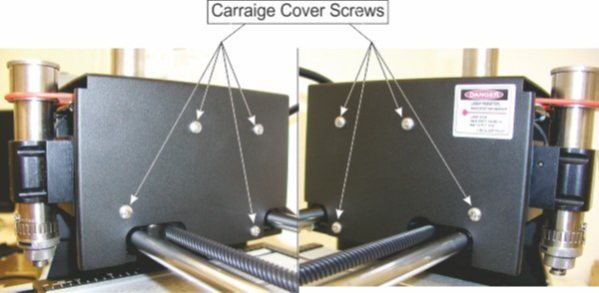
Carriage Cover
Remove the four screws on each side of the Carriage Cover .
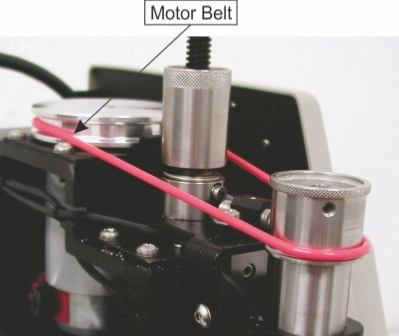
Motor Belt Removal/Replacement
To remove the motor belt, roll the front edge of the belt up towards the top of the spindle and over the lip at the top. To replace the belt, align the belt in the motor pulley and pull the belt forward and roll it down over the front edge of the lip on the top of the spindle. Do not excessively stretch the belt when replacing it.
Helpful Tip: Remove any cutter or drawbar from the spindle, this will make it easier to remove the belt.
Remember to put on all covers when finished.
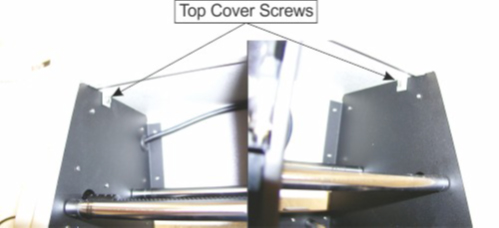
CHANGING THE MOTOR BELT ON THE VE810 ENGRAVING MACHINES
Over a period of time, the VE810 motor belt will wear. When the motor belt wears, it will stretch and cause the spindle to slip or stall. When this happens, the motor belt generally needs to be changed. The following explains the procedure for changing the motor belt.
COVER REMOVAL
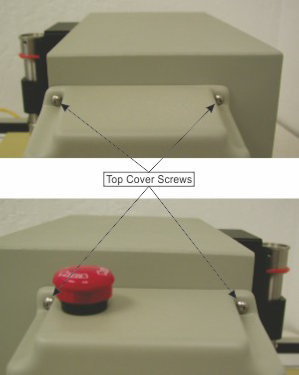
Top Cover Screws
Remove the two top cover screws (shown below).
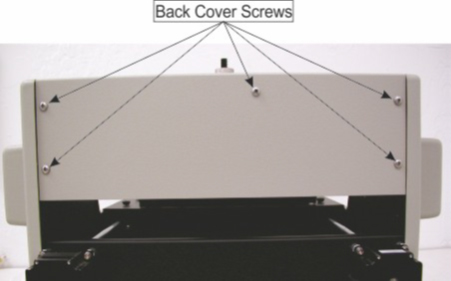
Back Cover Screws
Remove the five back cover screws (shown below). The center screw does not absolutely need to be removed. It holds a cable clamp inside the back cover of the machine. To remove the center screw, reach inside the machine with a 11/32″ nut driver to hold the nut and remove the screw with a Phillips screwdriver from the back of the machine.
Spindle Cover
To remove the spindle cover, slide the cover up. Squeezing the sides of the cover will facilitate removal.

Carriage Cover
Remove the four screws on each side of the Carriage Cover .
Motor Belt Removal/Replacement
To remove the motor belt, roll the front edge of the belt up towards the top of the spindle and over the lip at the top. To replace the belt, align the belt in the motor pulley and pull the belt forward and roll it down over the front edge of the lip on the top of the spindle. Do not excessively stretch the belt when replacing it.
Helpful Tip: Remove any cutter or drawbar from the spindle, this will make it easier to remove the belt.
Remember to put on all covers when finished.
CHANGING THE MOTOR BELT ON THE VISION EXPRESS ENGRAVER
If the belt appears to flare out when the spindle is operating then it should be replaced. In order to change the motor belt, it is recommended to remove the spindle cover, top cover and the carriage cover. Power off the machine, slide the spindle cover up and remove. Remove the top cover screws and top cover, then remove the carriage cover screws and carriage cover.
Helpful Tip: Remove any cutter or drawbar from the spindle, this will make it easier to remove the belt.
To remove the motor belt, roll the front edge of the belt up and over the top of the spindle.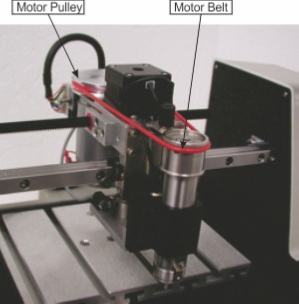
To install the new belt, position the belt in the groove of the motor pulley and pull the belt toward the top of the spindle. It will help to pull the belt forward and roll the front portion of the belt downward when stretching it over the top of the spindle. Once the belt is in place, rotate the spindle by hand a few times to check for binding and to make sure the belt is properly installed. Re-install the covers.