
When an object is selected it becomes blue and 9 square nubs appear.
By left click and holding on the center nub, you can drag the object selected around the screen. By selecting any one of the corner nubs left click and hold, you can resize the object selected proportionally. By selecting the top, bottom, or side nubs left click and hold, you can stretch the object selected. The curved arrow allows you to rotate the object manually.
Another thing that can be done with the nubs is go to a specific X,Y coordinate. Notice the 9 smaller nubs (positioning nubs) above the icons and that there is an X and Y number to the right of those.
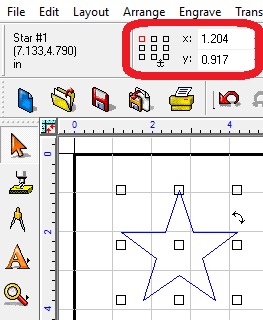
The upper left positioning nub has been selected (left click on it) and is in red. The X and Y are showing where the upper left nub on the selected object is in relation to the ruler (to the top and left).
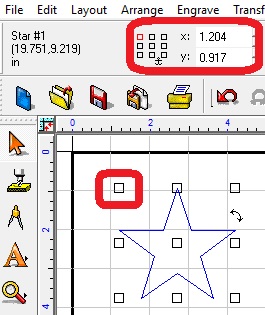
By double left clicking or dragging across the Y or X box, we can change the location of our object. For example: We are going to cut out this star from 1/16” engravers plastic using a cutter/beveler tool but we need to keep our object (star) from being at zero so we don’t cut into our guide rails on the machine or miss the plastic on the edge. So it is best if the object is at least 1/8” (.125) from the top and left edge.
This is very helpful for positioning any objects in the software and any of the 9 nubs can be used.