
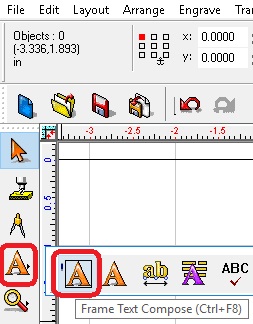
For the Vision 10 software, there are a few things to know about getting around in the Frame Text Compose. First thing is to left click on Text Tools (left side icon row) and then Frame Text Compose.
Left click on the Default Settings drop down menu and left click the Expert setting near the bottom (this will keep a settings menu from popping every time you open the text tools). You also can set defaults for things like Font, Justification, etc. If you do set defaults, make sure you check the box for that default and check Always use selected defaults for new text near the bottom left.

Frame Text Compose keeps the text inside of the plate and lets you put margins in.

If you select the object you would like to have text margins in then go into Frame Text Compose, it sets up nicely.

If you want to get to things like Kerning Percent, left click on the Toolbar Mode drop down menu.

From there, you can left click on Character for Kerning Percentage or if you want to change the Text Margins, left click on Frame.

For most everything else, just hover over the area and a label will pop up telling you what that box or icon is.
Check back next month for another Quick Tip.