
Using Filter By Color in Vision’s engraving software is a good way to control what is run and in what order when sending jobs over to your engraving machine.
Filter By Color can be very useful when designing a job in Vision’s engraving software that involves engraving and cutting through the material or if different tools/ tool paths are used. Filter By Color can be set as a default for any driver or manually enabled when sending a job to the machine.
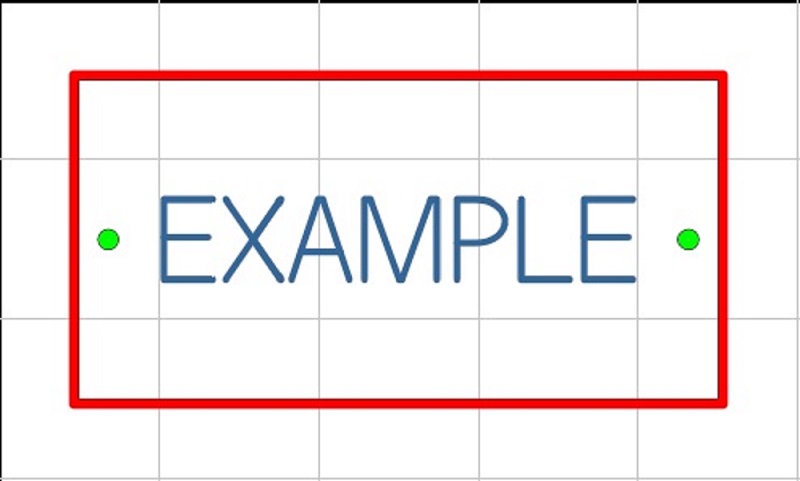
A good example for the Filter By Color is a tag that needs to be engraved and cutout. This 2”x4” tag has online tool path for the text, a female tool path for the mounting holes, and a male tool path for the cutout of the tag- 3 different tool paths with 2 tools. Order is important- inside cuts and engraving first, final cutout is last.
Send over the whole job (the Engrave button on the left Icon bar), then click on Filter By Color.
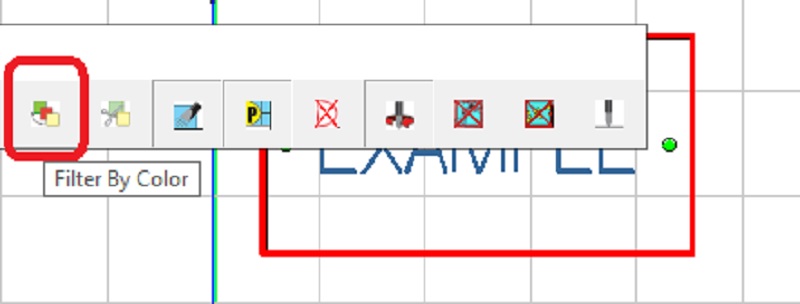
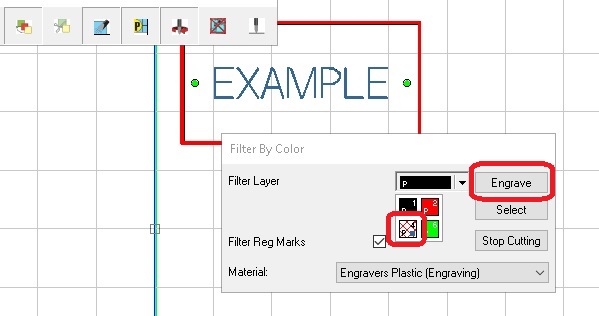
Another window pops up and from here you can drop down the color bar and pick which color to run first.
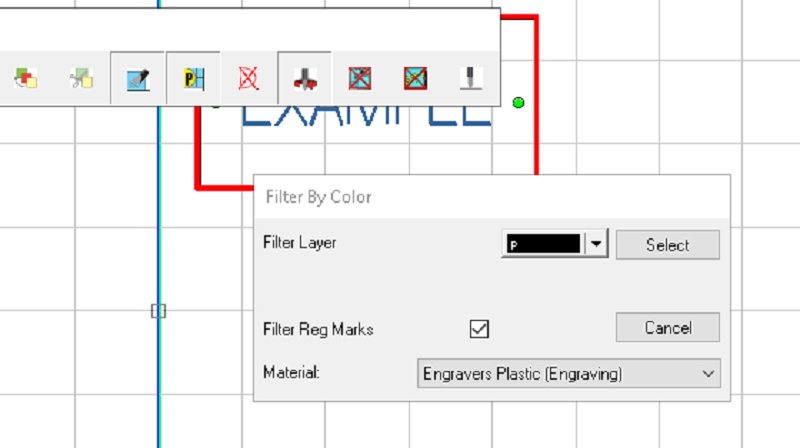
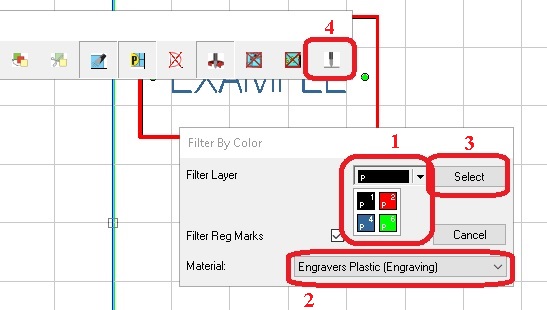
Click on the color to run first and make sure you have the correct Material setting, then click Select, then click Engrave on the Cut Toolbar, which will send the job to the engraving machine.
Stacking the jobs is not recommended (send over more than 1 color at a time). Sending over individually allows you to dry run if needed or rerun the job you just did (i.e. the engraving wasn’t deep enough) and if you stack the jobs, it can be confusing about what tool and when.
After the first color is sent over, drop down the color bar and click on the next color to run and click the Engrave button which sends over the job. When you drop the color bar down, notice that the previously sent color/s are crossed out showing that is was sent but you can still send it over again if needed. The Select button under the Engrave button can be used to check what you are sending before running it.
***Remember to change the Material setting as needed before sending over the color (i.e. going from engraving to cutout or cut through-Engraver’s plastic engraving to Engraver’s plastic cutter/beveler***
After the last job has been sent over to the machine (make sure it is actually at the machine), just click on Stop Cutting.

Hopefully using Filter By Color in Vision’s engraving software will help you on your next engraving project. Check back next month for another Engraving Quick Tip.
Check back next month for more Engraving Quick Tips. Contact Vision Engraving & Routing Systems today. To learn more about the Vision’s Engraving Software, get a price quote, request a free online demo. Visit us online at www.visionengravers.com or call 1-888-637-1737.