
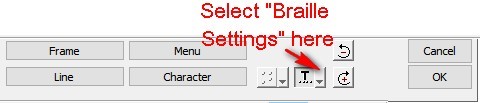
- Go to your Text Tools, then select “ADA Raised Text”

- Go to Braille Settings
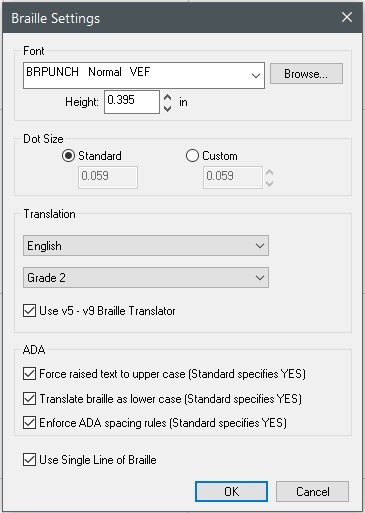
- From this screen you can change the braille Font (Standard or California), Translation, and other ADA Braille settings. Below are the default settings that should be used for USA Braille Standard Grade 2 – English.
Check back next month for more Engraving Quick Tips. Contact Vision Engraving & Routing Systems to learn more on how to Setting Braille Properties, request a free online demo. Visit us online at www.visionengravers.com or call 1-888-637-1737.