The home position is your engraving machine’s starting position, it is also the position your engraver will move back to when it is done running a job. The ability to set a custom home position can be very useful. If the shape of the object you are engraving blocks the path of your engraving head when leaving or returning to the default home position, you can change the home position to avoid hitting your engraving material. Changing your home position can also help speed up the engraving process by shortening the distance your engraving head needs to travel to or from during the start and end of a job. This quick tip is only for the series 5 Express Small Engraver, VE810 Small Engraver, and Phoenix Medium Engraver. You can set a custom home position on the Series 5 large machines and all of the Series 3 and Series 4 machines as well however, the process is a bit different.
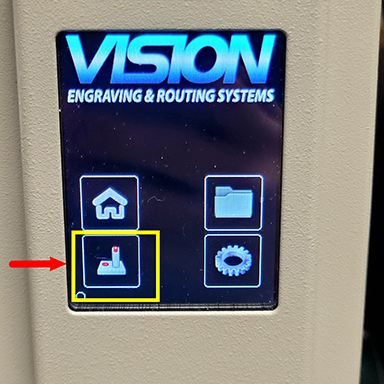
First press the Jog icon on the built-in touch screen. See Fig. 1
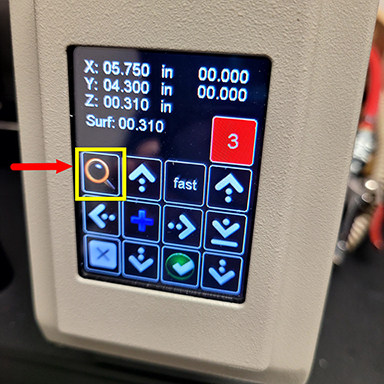
Next, turn on the laser by selecting the magnifying glass icon. See Fig. 2
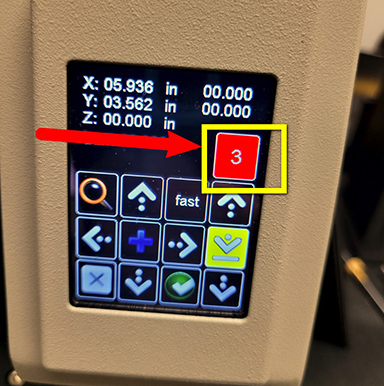
Scroll through the custom home selections icons. For this example, we have selected custom home “3.” Note that the “3“ icon is highlighted red. To change your home position, simply tap the current home position until you reach the “3”. Fig. 3
Next, use the directional arrows on the jog screen to position the laser to your new custom home position. In Fig. 4 we have moved the laser to the upper left-hand side of the object we are engraving.

Press the “blue cross” icon at the center of the touch screen to set your custom home position. See Fig. 5

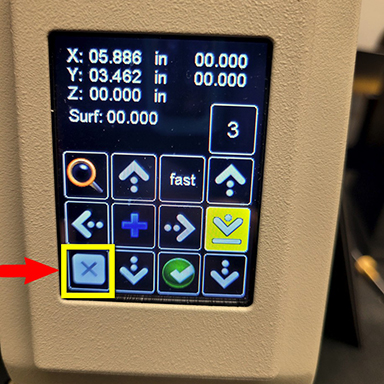
Select the “X” icon in the lower left corner to return to the home screen. See Fig. 6
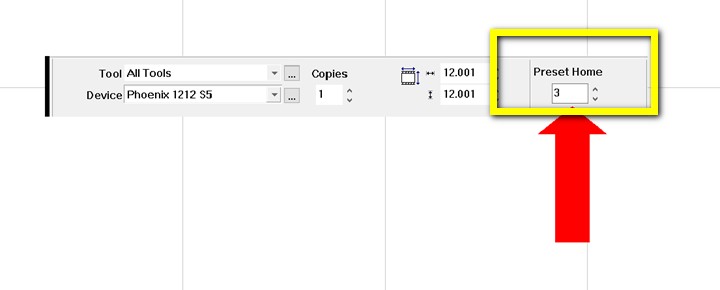
You will also need to set the home position to “3” in the software before you send the job. See Fig. 7
Remember to change back to “home 1” when you have finished with this project.
Check back next month for more Engraving Quick Tips. Contact Vision Engraving & Routing Systems to learn about setting a custom home position, or to request a free online engraving demo. Visit us online today at www.visionengravers.com or call 1-888-637-1737.
