Vision Engraving & Routing Systems allows sign shops to engrave ADA-compliant Braille signs by using Vision’s Automatic Raster™ Braille Insertion tool and Vision PRO software. Vision Pro Software includes fonts specific for Braille signage and also lets you know when your Braille sign design is non compliant. The optional Raster™ Braille insertion tool used in conjunction with a Vision engraver or CNC router allows for precise placement of Rasters™ (Braille beads), which is essential when producing ADA compliant signage. In most cases text and Braille are both included when creating an ADA Compliant Braille Signs, however sometimes a customer will request a sign with just Braille. Here is a quick tutorial on how to create a Braille only sign, no text.
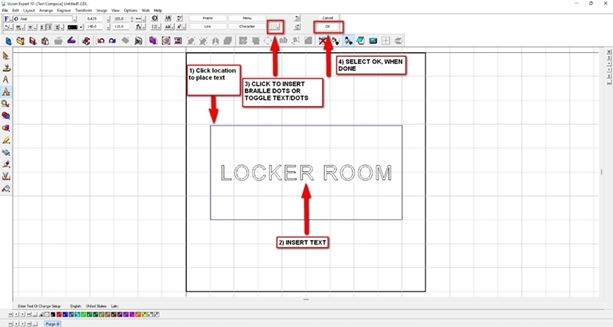
- On the side tool bar select text tools.
- Select ADA braille only.

- Click and place text box, where you want to insert text.
- Insert text.
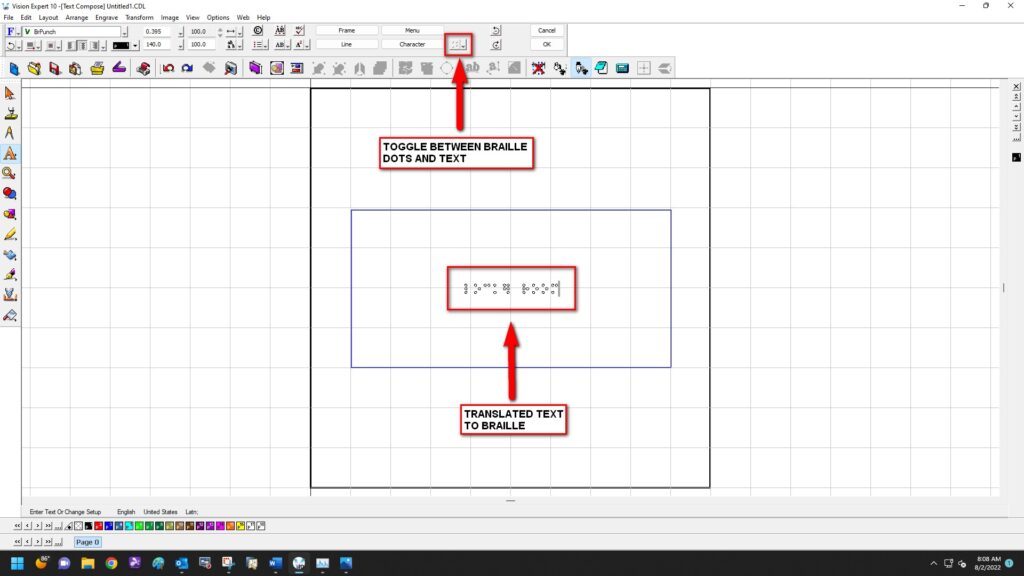
- Click on braille dots on top of screen for braille translation or to toggle between braille and text.
- Click OK when finished.


All of the steps in numbers.
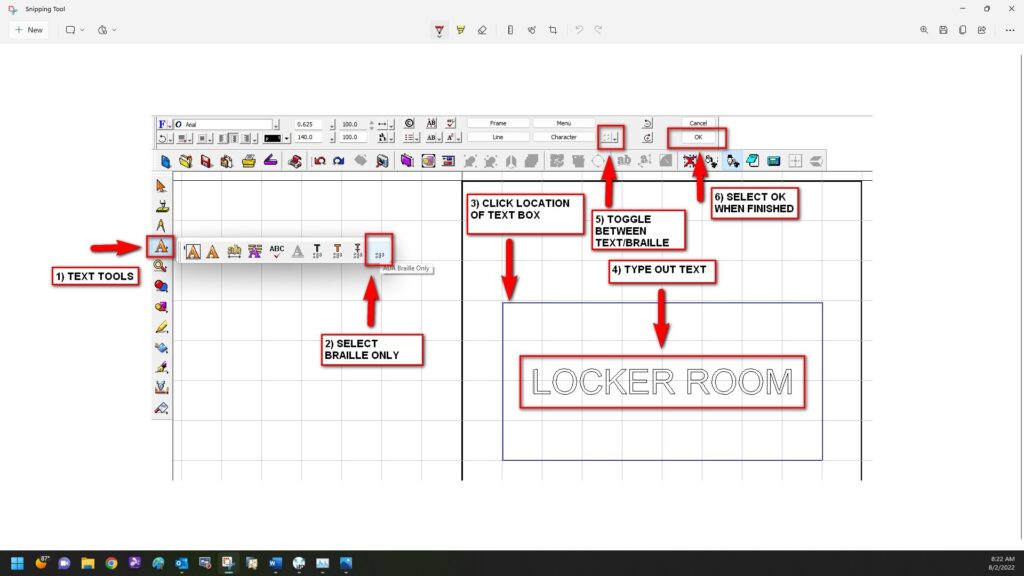
- Go to Text Tools.
- Select braille Text Only.
- Click where you want to insert text.
- Type out text.
- Toggle between your text and braille.
- Select OK, when you are finished.

Check back next month for more Engraving Quick Tips. Contact Vision Engraving & Routing Systems to learn about engraving braille only, or to request a free online engraving demo. Visit us online today at www.visionengravers.com or call 1-888-637-1737.
