This quick tip on how to Create 3D Objects only applies to Vision Pro 10 with updated license files.
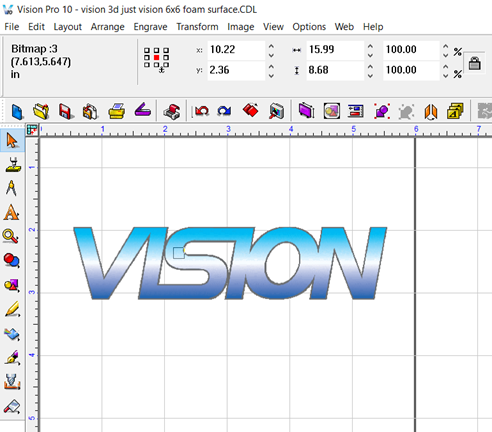
To create 3D objects we must first either import or copy and paste an image file into Vision Pro 10. Graphicly advanced Vision Pro Engraving Software allows you to import many file types including GIF or TIF formats with transparent backgrounds.
The imported image object must fit within the plate-size window box. You will want to use a high-quality image with a high resolution. For this tutorial, we are using the Vision logo.
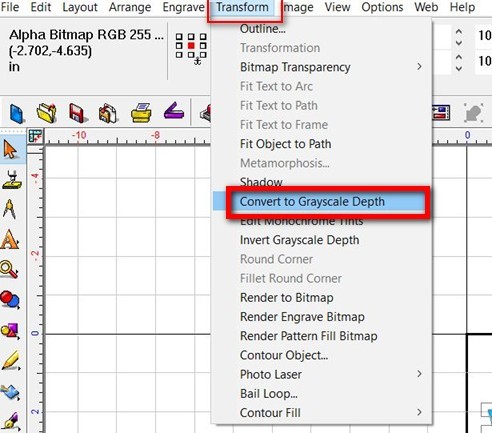
Next convert the imported image into grayscale by using the “Convert to Grayscale Depth” tool, in Vision Pro 10. You will find it in the drop-down menu under Transform.
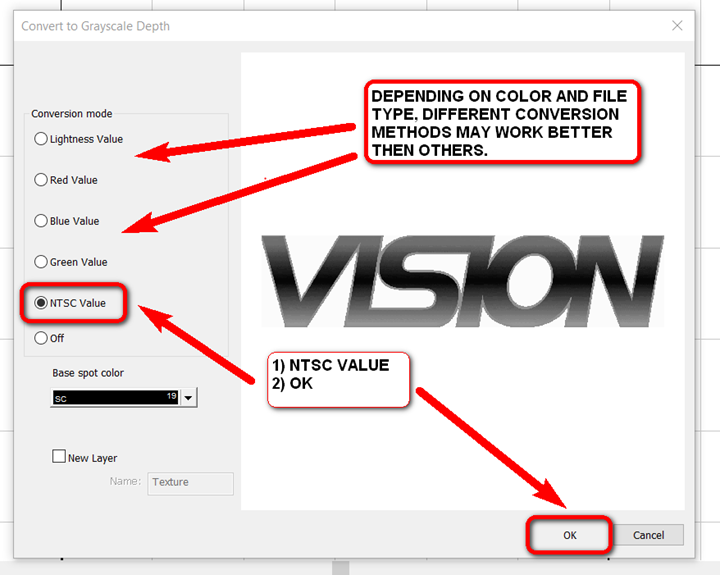
Try different conversion modes to find the ideal conversion method for your imported image file type, different modes may work better than others.
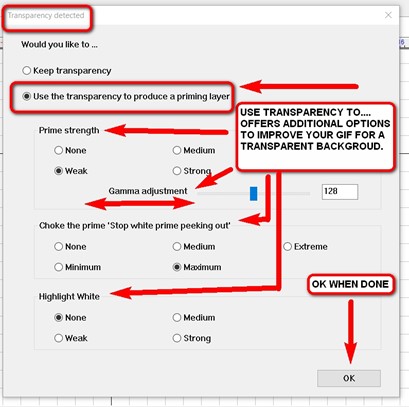
Any images with a transparent background will be detected automatically.
Select “Keep Transparency” then click “OK” when done.
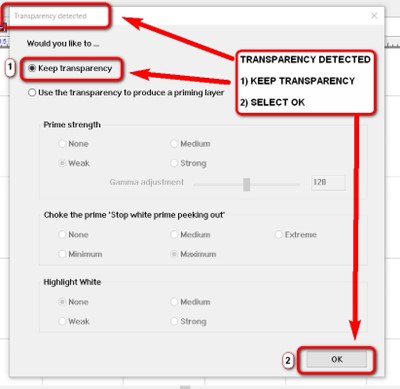
Select “Use the transparency to produce a priming layer” Try different options to find the ideal setting to convert your imported graphic into grayscale..
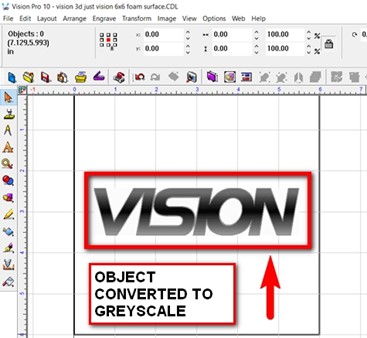
Below is an example of the Vision logo converted into grayscale using Vision Pro 10 engraving software.
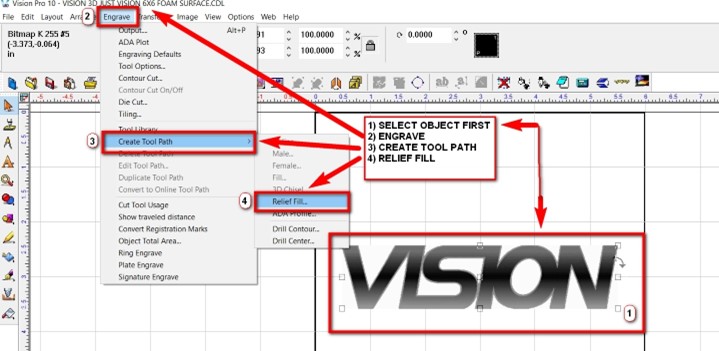
Once you have converted your image into grayscale, you will need to create a relief fill tool path for your image. Select your image then click on “Engrave” on the menu bar, then “Create Tool Path”, and next click on “Relief Fill”.
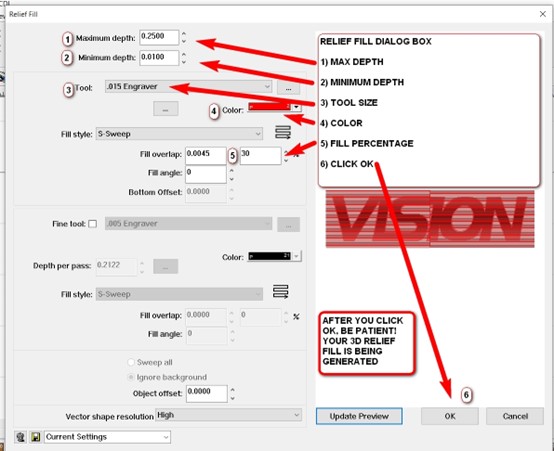
The Relief Fill window will pop up.
Here is a brief description of the different settings in the “Relief Fill” window.
1) Max Depth: Depending on the depth of your material and time.
2) Minimum Depth: Below the surface of the material.
3) Tool: The smaller the tool size, the more detail.
4) Color: Something contrasting
5) Fill Percentage: 20%-30% will usually provide enough detail.
After adjusting your setting appropriately click “OK” Vision Pro 10 will now create a 3D object from your grayscale image.
When the relief fill has been created, you can view your object in 3D in the 3D viewer.

To view the generated object in 3D, select “View” in the menu bar and then “Show 3D” in the drop-down.
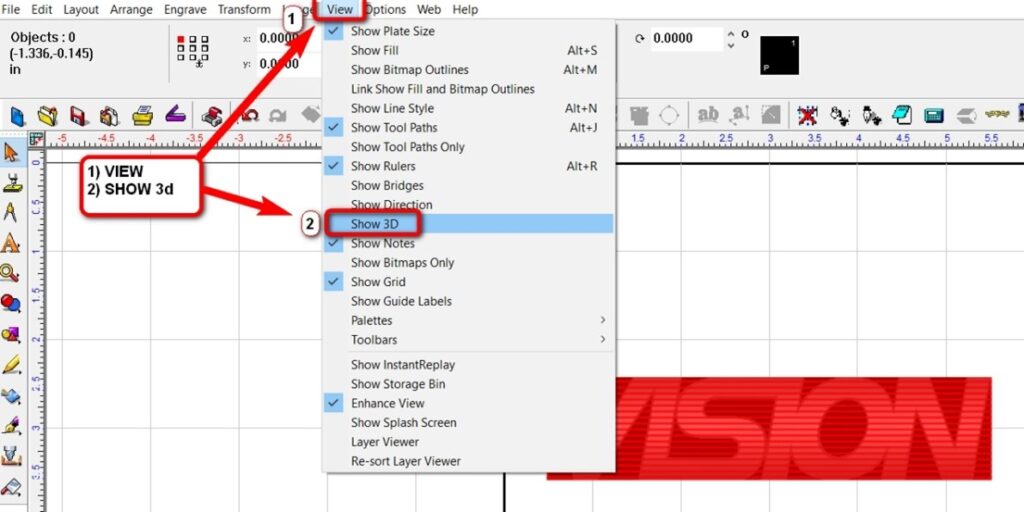
In the 3D viewer, you can pan in or out and view from several different perspectives.


Invert the grayscale on your image to make the lows high and the highs low when it’s converted to 3D

To invert your grayscale image, select “Transform” on the menu bar then click on “Invert Grayscale Depth”.

Below is what the inverted grayscale image will look when converted to a 3D object.

Check back next month for more Engraving Quick Tips. Contact Vision Engraving & Routing Systems to learn about Creating 3D Objects, or to request a free online engraving demo. Visit us online today at www.visionengravers.com or call 1-888-637-1737.
