Please Note: This is for the VE810 machine and larger and equipped with a red dot laser pointer only.
It can be challenging to correctly position text and/or graphics on irregular shaped items since they are difficult to measure or locate on the engraving table. For example, some tags may have a design on them so you have a limited area in which to engrave.
A simple way to engrave a custom area on a part or irregular shaped item is to use the measure feature. You will begin by mounting the material on the machine with clamps or other accessory.
Next, in the Vision Pro software, under ‘Layout’, click on ‘Plate Size’ or push the ‘Plate Size’ icon, which will open the Plate Size menu.
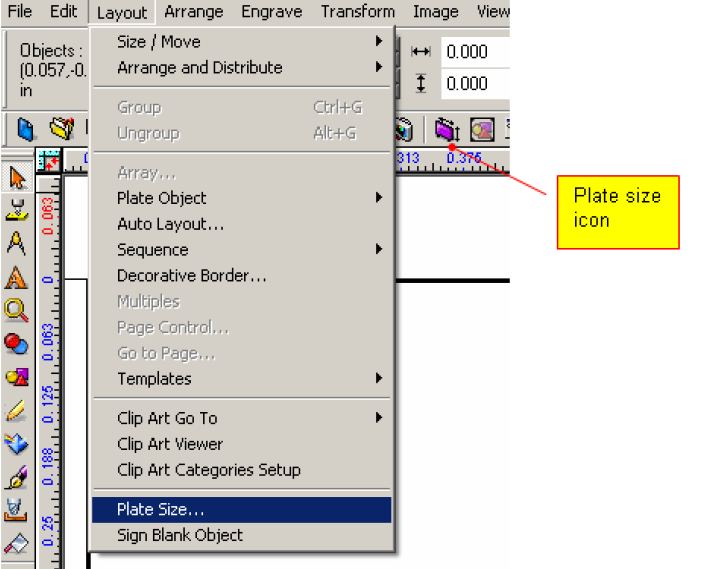
At the bottom of the Plate Size menu click on ‘Measure’. This will bring up the ‘Measure’ wizard menu and turn on the red laser pointer.

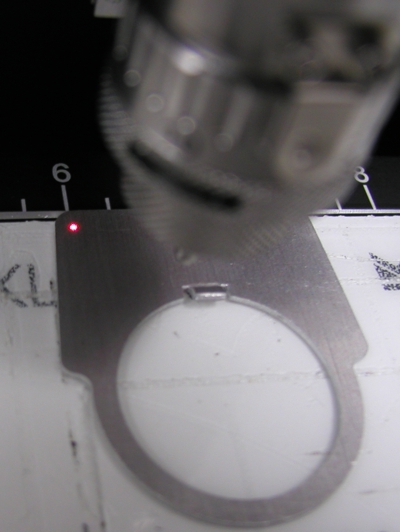
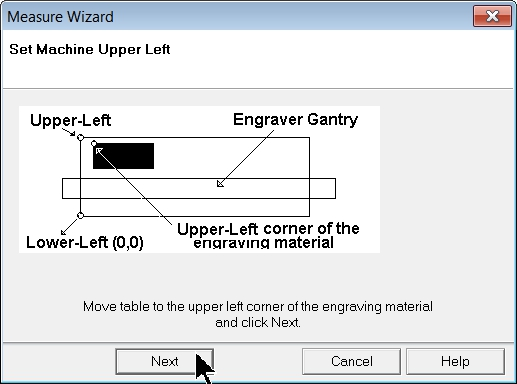
Using the machine jog buttons, move the rad pointer to the upper left corner of the area to be engraved and click ‘Next’.
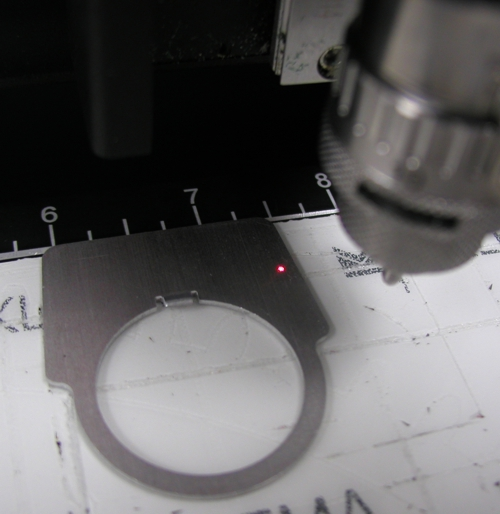
Now using the machine jog buttons, move the rad pointer to the lower right corner and click ‘Finish’
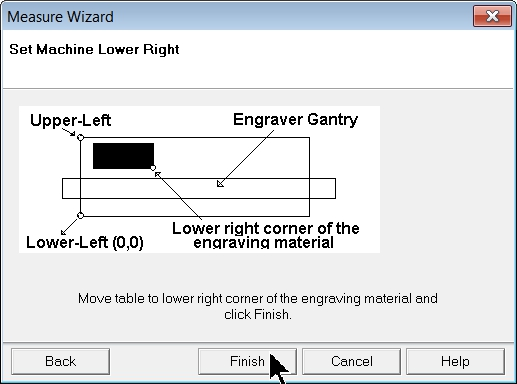
On the pendant, press ‘Enter’ to preview the plate size, then ‘Exit’, when finished. You will be returned to the Plate Size menu showing you the dimensions of the area you measured.
Press “OK” to create a plate in this size.
The machine ‘Home’ will now be set automatically to the Top Left corner you specified when you performed the measure operation.
You can now design a job inside this plate and it will engrave into the box you measured on the material.
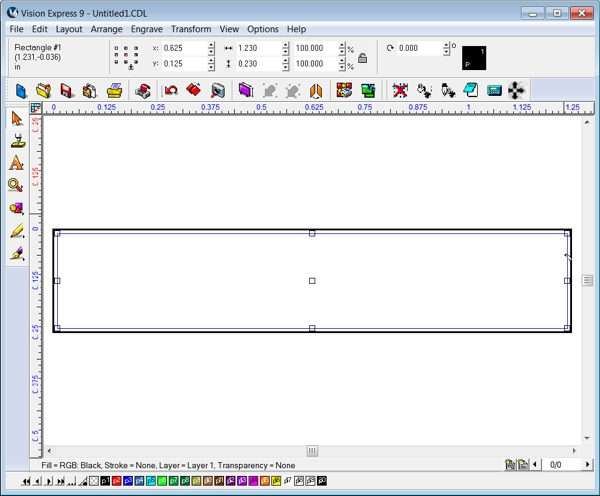
Hint – It may be helpful to Dry Run the job using a simple rectangle that is slightly smaller than the engraving area, as shown below. The Red Dot Laser Pointer will follow the path of this rectangle and outline the engraving area. This can make it much easier to properly position your custom home and graphics before sending the final job to the machine.
Engraving a Custom Area on an Irregular Shaped Part or Item
(An alternate method for machines not equipped with a red dot laser pointer)
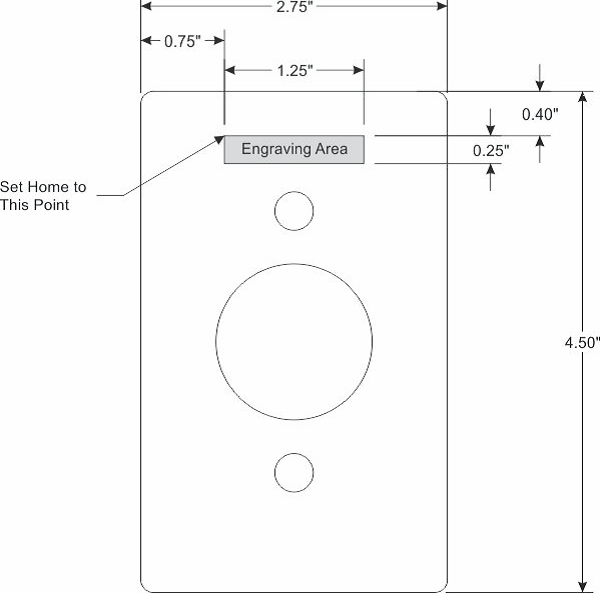
Vision machines custom home feature will help user’s position items and graphics for challenging applications so you’re not limited to where you put the material to engrave. Typically, the home is set to a point on your material in the upper left hand corner of the area to be engraved. Take a look at this electrical outlet cover shown below. In this example, the user identified the engraving area, and the home (0,0) position of the machine will be set to match the upper left corner of the engraving area. The engraving area is 1.25 inches wide x 0.25 inches high.
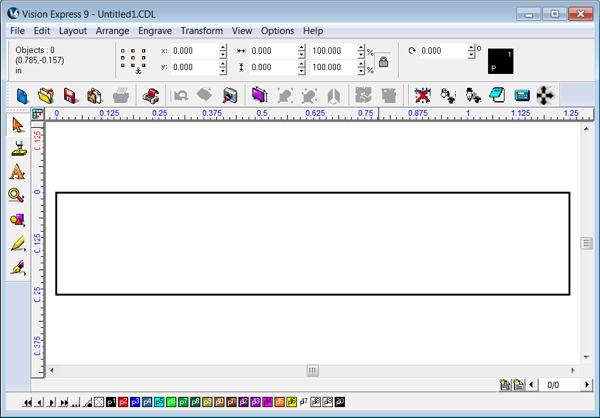
In the Vision 9 software, begin by making the plate size the same as the engraving area (1.25 inches x 0.25 inches), as shown below.
Next, add the text. The Frame Text Compose tool will center and adjust text to fit the plate/engraving area.
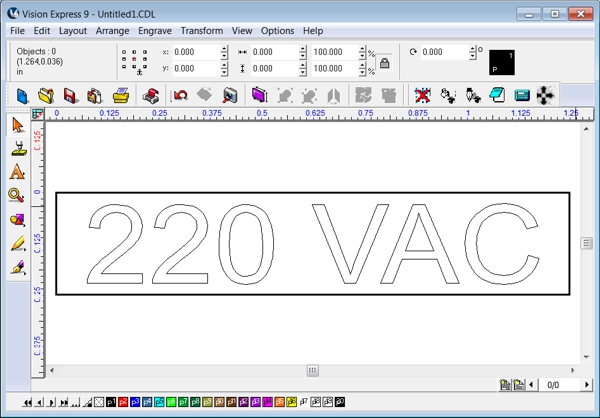
To set the home position of the machine to the upper left corner of the engraving area, place the material (in this example, the outlet cover) on the engraving table and secure it using a work holding accessory. Install a tool and set it so the tool tip extends below the nose cone and the tip can easily be seen. It is best to use a tool with a defined point when performing this setup, such as the diamond drag tool used here. (See next picture)
The next picture shows a 1.25″ x 0.25″ piece of paper applied to the material to make it easier to reference and locate the upper left corner of the engraving area. Move the spindle using the X, Y and Z jog buttons on the engraver, so the tip of the tool is directly over the upper left hand corner of the engraving area. The spindle/tool tip is correctly positioned in the upper left corner of the engraving area.
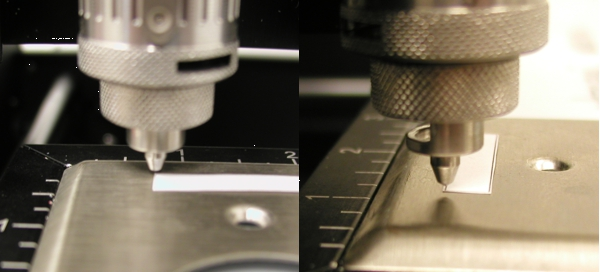
To set this point as the Home Position, press the ‘Set Offset’ button (on the VE810), or press the ‘Set Home’ button on the pendant for larger machines. A message will appear on the LCD Display that reads “Home Set.” All files sent to the engraver will now use this location as the Home Position (0,0) of the engraving area.
When you want to return to using the default Home Position, press the ‘Go To Limits’ button on the Pendant, or Shift + Ctrl10 on the VE810, then press the ‘Set Offset/Set Home’ button. The home is now reset to the default home position. Send the job to the engraver as a Dry Run to determine whether or not the job is positioned correctly. If it is, you are ready to engrave the item. If the positioning is not correct, you can either adjust the graphics within the Vision 9 software, or reset the custom home position to the proper location.
