
Vision software allows you to assign different colors to text and objects within your workspace. 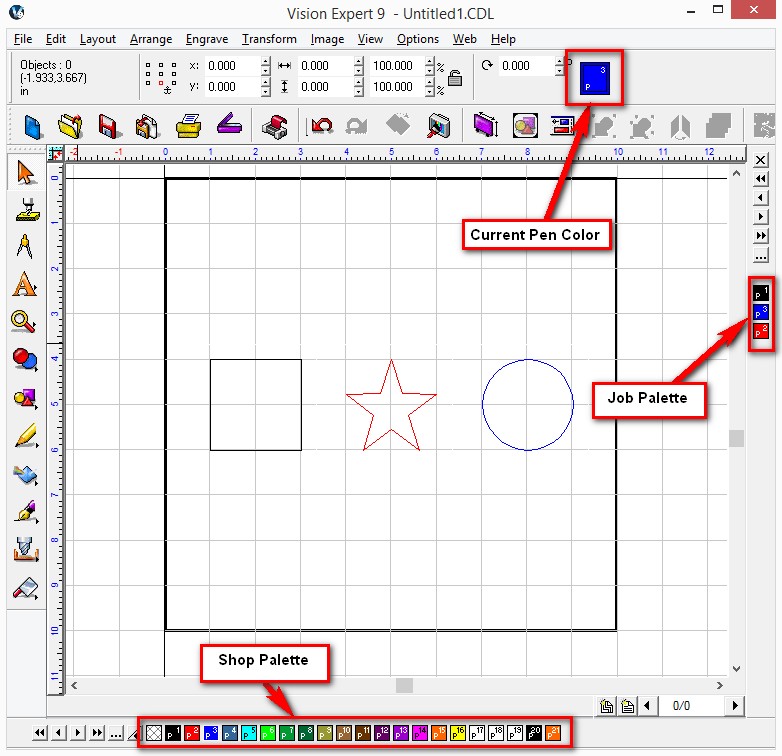
Current Pen Color – Shows the color of the current pen in use.
Job Palette – Shows the colors of objects within the workspace (not available in Express version).
Shop Palette – Shows all available colors within the palette.
Color Palette Tips
When clicking a color in the Shop or Job Palettes, additional tools are activated by pressing the [Shift], [Control], or [ALT] keys. The following table summarizes these modifiers:
- It is recommended to both left-click and right-click to assign a color to an object, or to change the current pen color
- Left-click – Set fill color of current object
- Right-click – Set line style color of current object
- [Shift] + Left-click – Select all objects of that fill color
- [Control] + Left-click – Disable the color plate. All objects with that fill color will appear as dashed outlines.
- [ALT] + Left-click – Disable all color plates, except for the plate that was clicked
- Double-clicking a color from the Job Palette will select all items of that color within your workspace
Why use different colors?
- There may be situations that you may not want to send all objects to be engraved at once, perhaps for a tool change or depth change. You can “Filter by Color” and send each color over individually.
- There may be design elements within your workspace that you do not want to engrave, like measurements or material information. You can assign a different color to these elements and filter them out.
- You can set the cut order by color using “Sort and Cut all Colors”. This will allow you to arrange the order in which the items in the workspace are to be engraved.