
This quick tip is on how to set surface on Vision’s Series 5, 16 Series Engravers & larger Routers / Engravers. Click the link to see how to set surface on Vision’s Series 5 small engravers & the Phoenix 1212 Engraver . You can set the surface on all of the Series 3 and Series 4 machines as well; however, the process is a bit different. Please read through this quick tip at least twice before attempting..
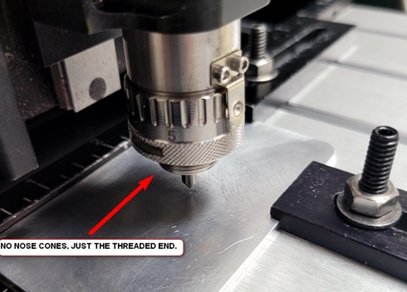
If you are only doing deep metal engraving, rotate the micrometer all the way to the top and remove the nose cone from the end of the spindle before setting surface.
First, insert the tool you are using into the spindle.
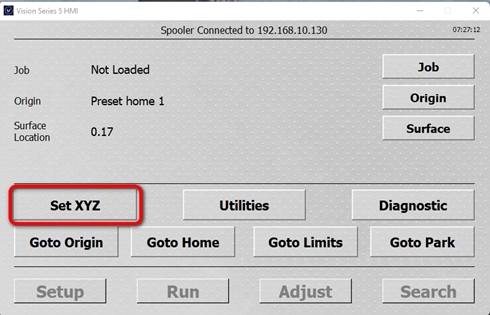
On the Series 5 Pendant go to the home screen then press the “Set XYZ” button. Next, use the arrows to move the spindle to the center of your material.
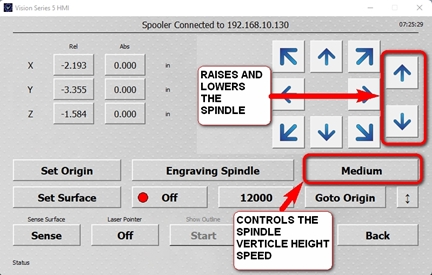
To adjust the movement speed of the spindle, press the speed button (labeled “Medium” in the image below) to toggle through Fast, Medium, and Slow. The speed button controls how fast the spindle moves. Use the Up and Down arrows on the far right side of the pendent to start lowering the spindle. When the tip of the tool gets about an inch above the material, stop lowering the spindle and select “Slow”. With the speed button set to slow, lower the tool tip as close as you can to your material without touching the surface.
Place a single sheet of paper between the cutout tool and the material, we are using a yellow sticky notepad paper in the example image below.
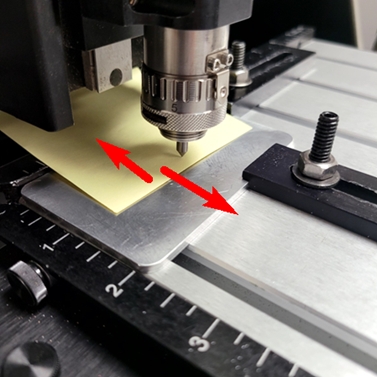
Lower the Z axis/ spindle down on slow while moving your paper back and forth until the tool just begins to scratch the surface of the paper which is about .003” thick.
Once you feel the tool scratching the surface of your paper, immediately STOP moving your Z axis/ spindle down.
On the lower left-hand side of the pendent, press the “Set surface” button.
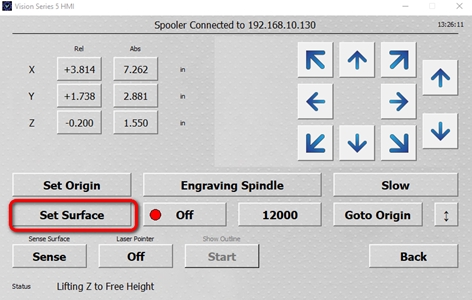
This will automatically lift the Z axis up .200” above the surface of the material. The surface is now set, and the up and down movement will be set to “Slow”

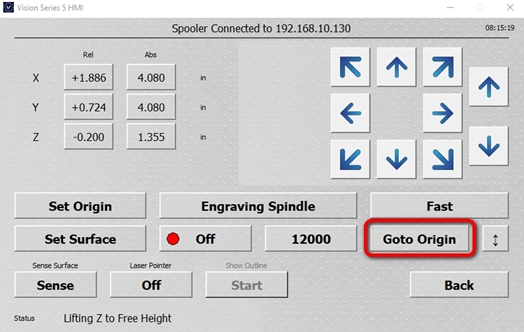
After you have set surface, press the “Goto Origin” button to return the spindle back to the home position.
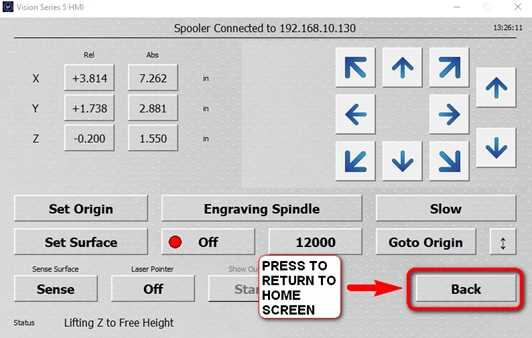
Press the “BACK” button on the pendant to return to the home screen.
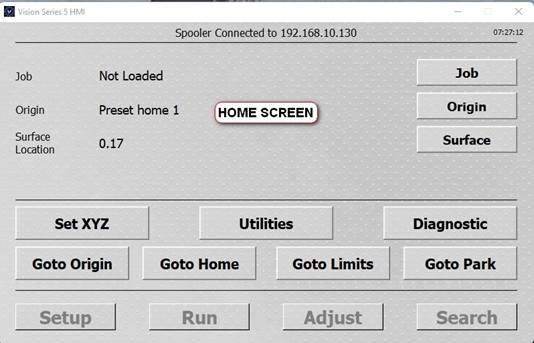
The image below is the “Home” screen”
You are now done.
Check back next month for more Engraving Quick Tips. Contact Vision Engraving & Routing Systems to learn on how to set surface, or to request a free online engraving demo. Visit us online today at www.visionengravers.com or call 1-888-637-1737.